

How To Add Texture To A Color In Photoshop
Photoshop has some fantastic filters. Y'all can really go creative and use texture overlays to develop interesting furnishings. For instance, you can create photo textures. Moreover, you tin can create parchment paper effects. Textured effects such as these tin add together depth to your digital images, transforming a uncomplicated image into something artistic.
 If you empathize the different filters, you can create any your imagination can conjure. In this guide, we expect at how to create an old newspaper texture. This texture is perfect for image backgrounds or as a photography texture overlay. In the 2nd office, we volition have a await at how to apply this texture in Luminar.Luminar is i of theall-time Photoshop plugins and has some bright effects that permit you toget creative with textures.
![]() Luminarthree
Luminarthree
Luminar three - Time Does Matter
The fastest way to make your photos stand out Circuitous photo editing made easy with
AI powered tools
- Emphasis AI 2.0
- AI Sky Enhancer
- More than than seventy Instant Looks
- Apace erase unwanted objects
- Denoise
- Sharpening
- And - More
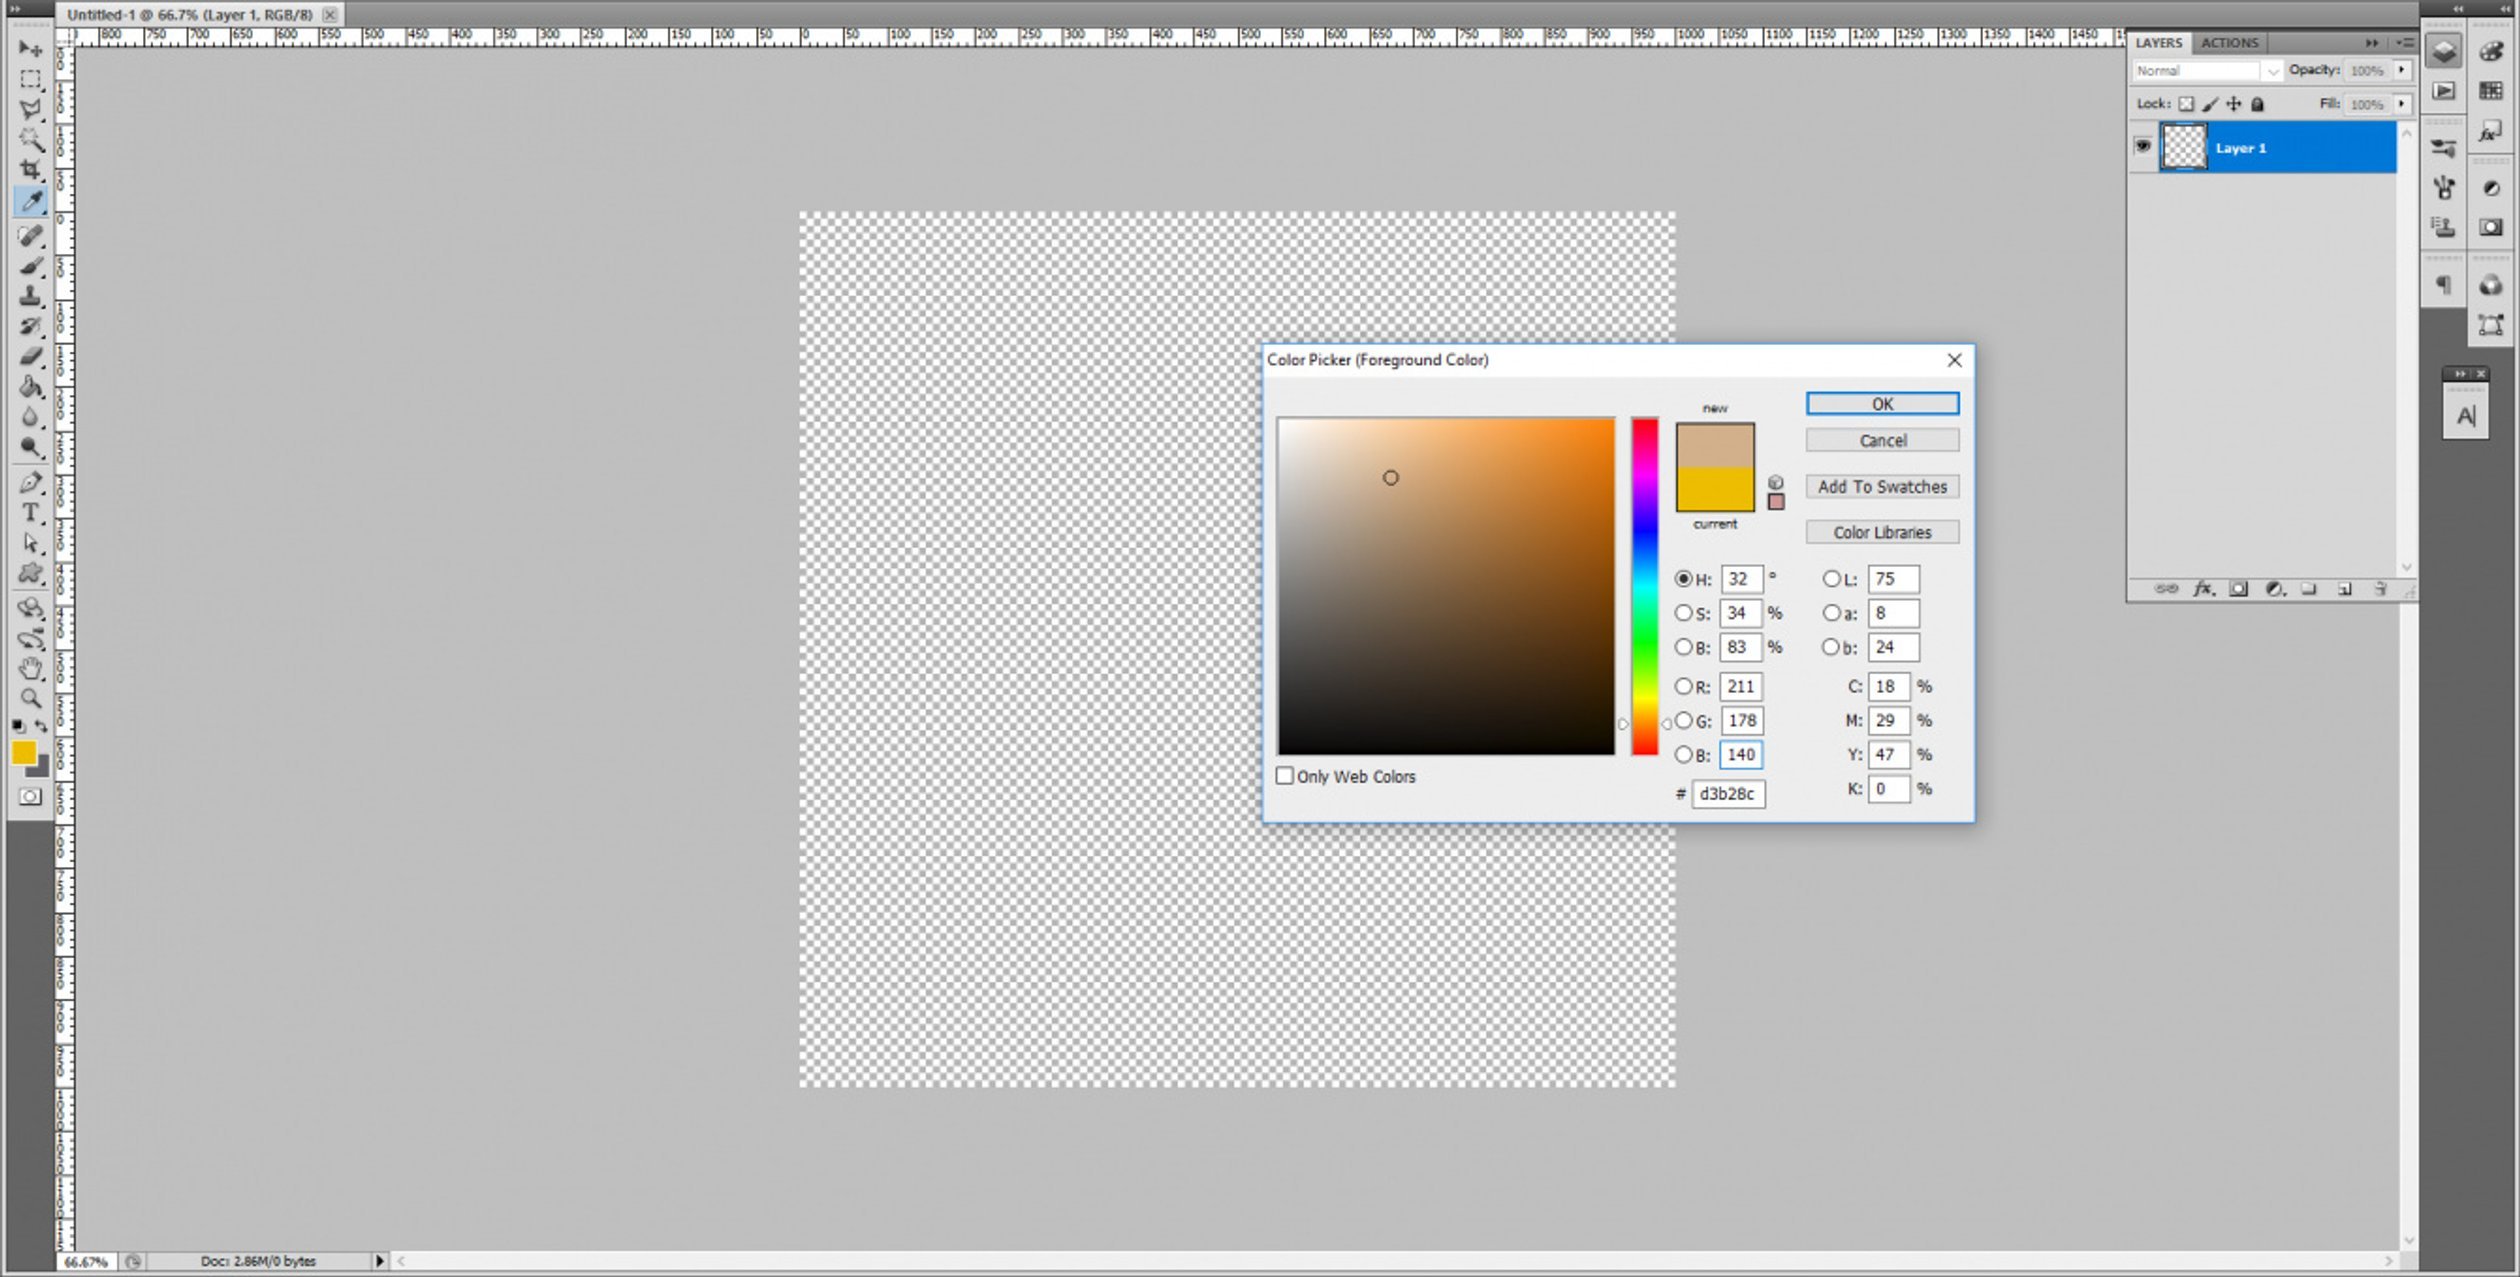
one. Create a new document and fill up it with a solid color
Get-go, create a new blank document (the document in our case is 1000px × 1000px at 72dpi). Fill the background layer with a solid brown (nosotros used R 211 / B 178 / Thousand 150). This volition exist the footing for your old paper texture. Cull whatever background color you lot feel is suitable. We chose this shade of brown as it resembles old parchment.
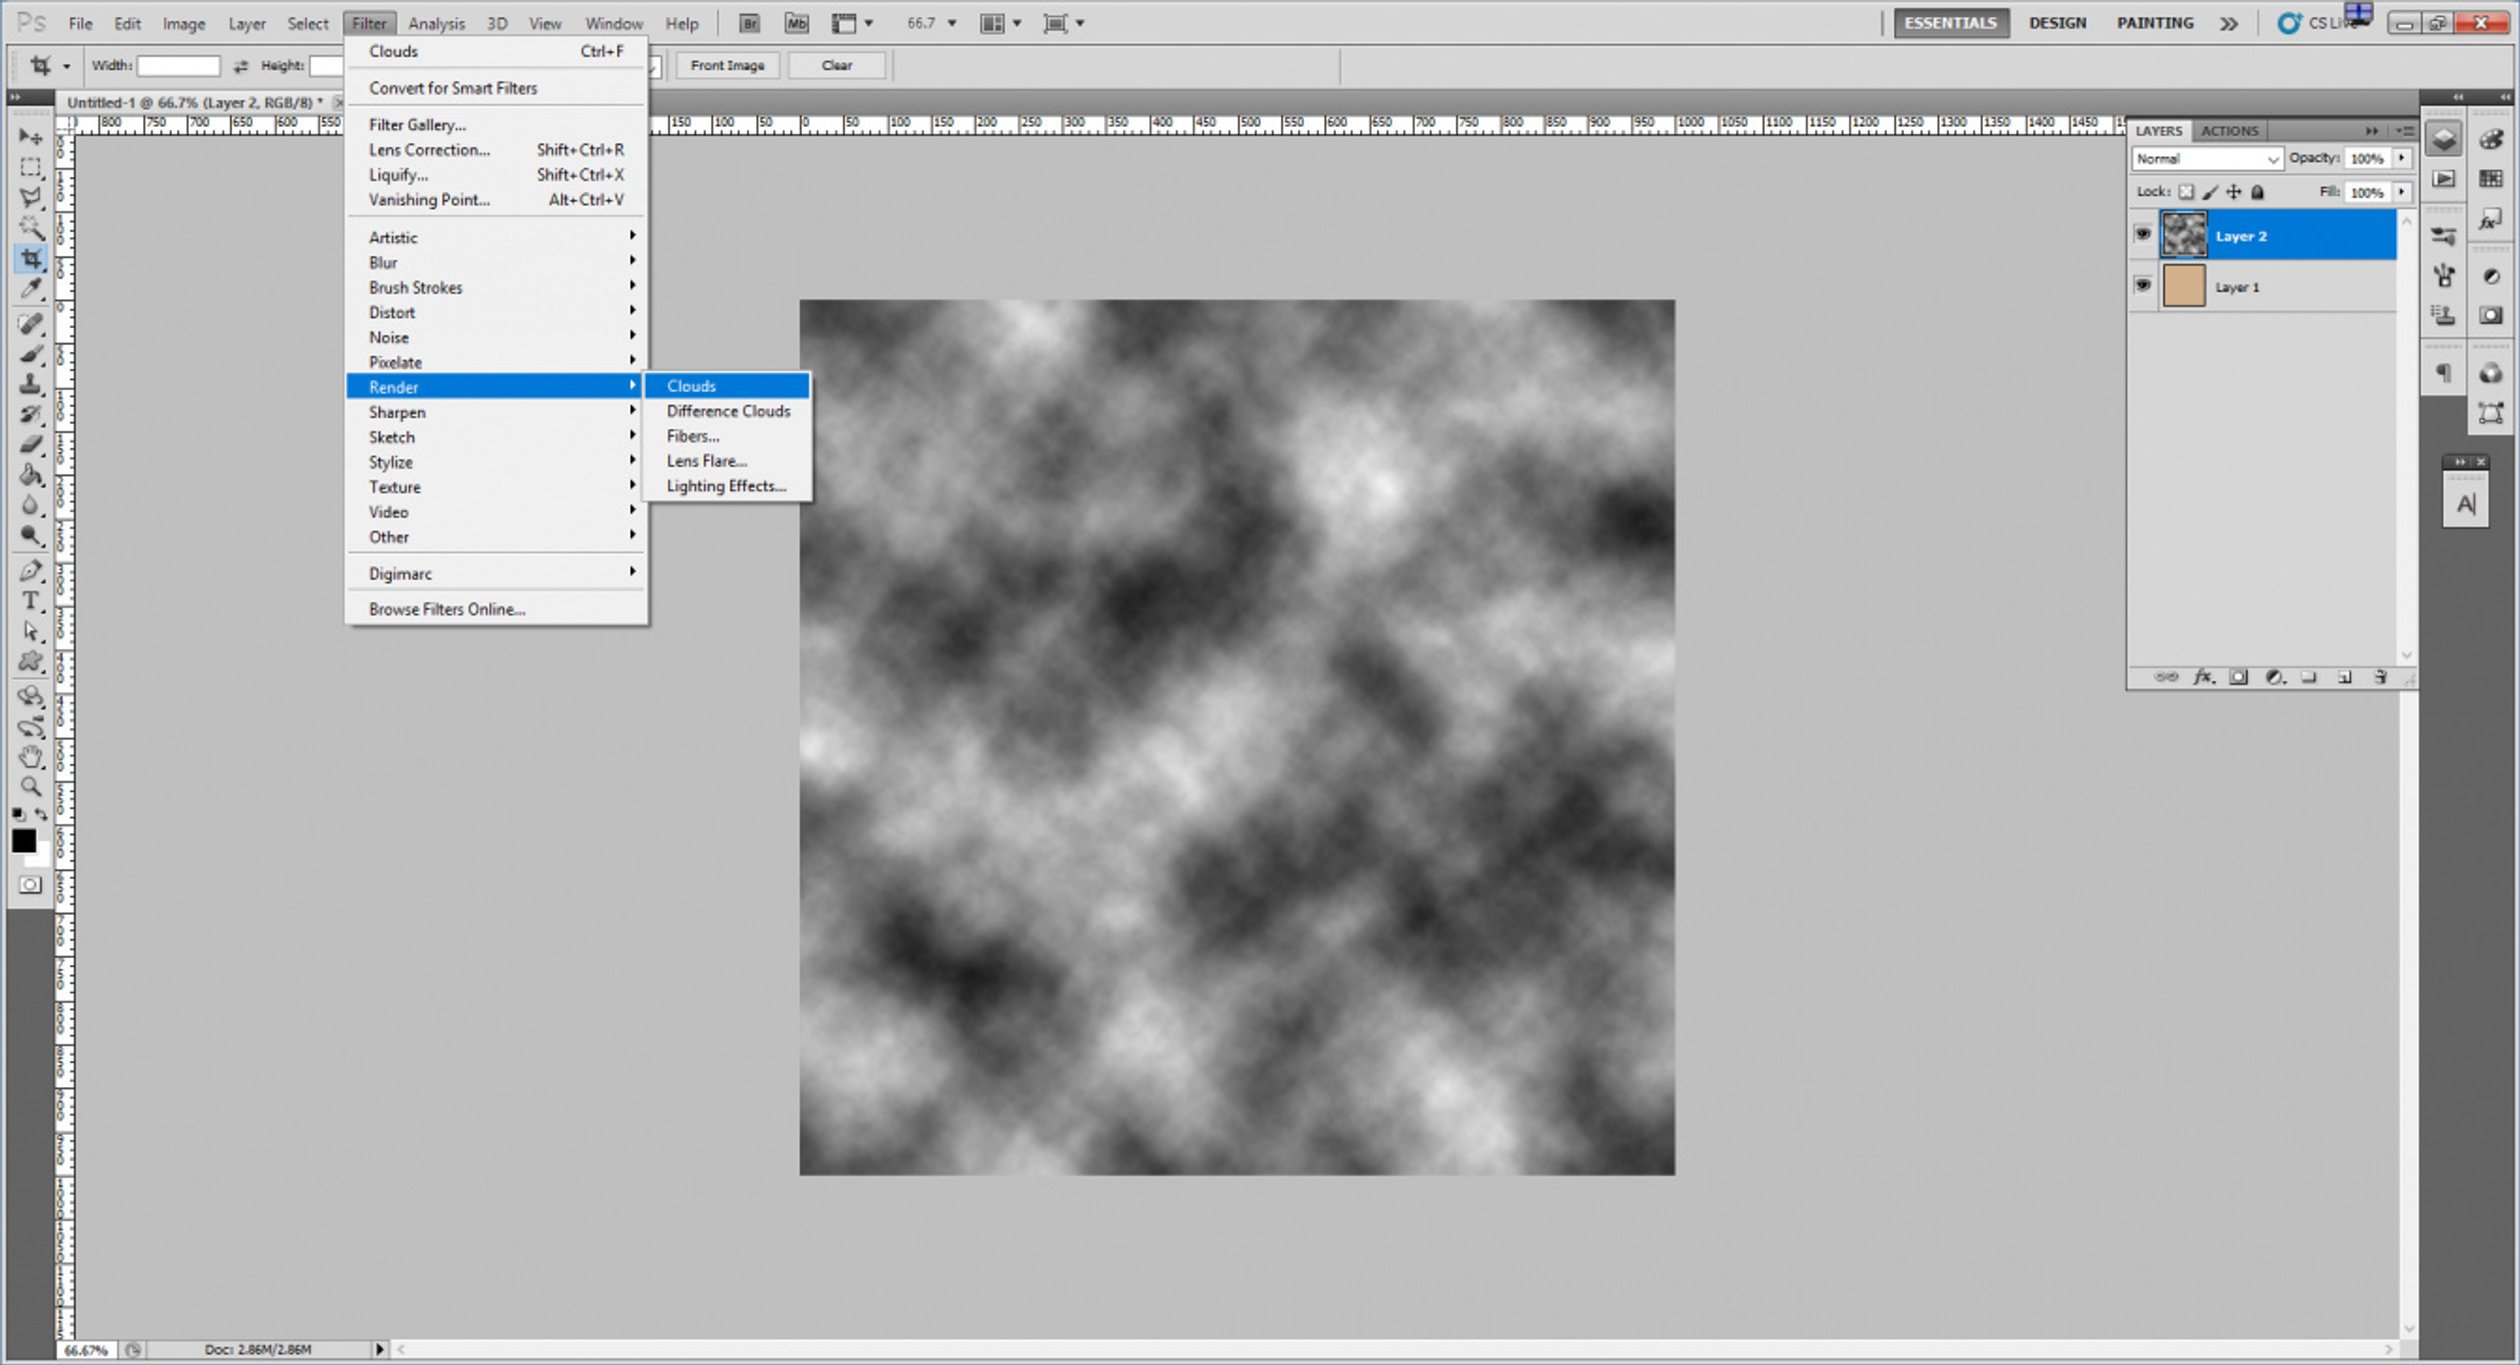
2. Create a new layer and apply the Clouds filter
Create a new layer on height of the brown background layer. Make sure that your colour selections are reset to blackness and white (shortcut keys X, then D). Utilize the Clouds filter: Filter > Render > Clouds. This will form the get-go layer of your paper texture background.
iii. Use the Spatter event and change the overlay style
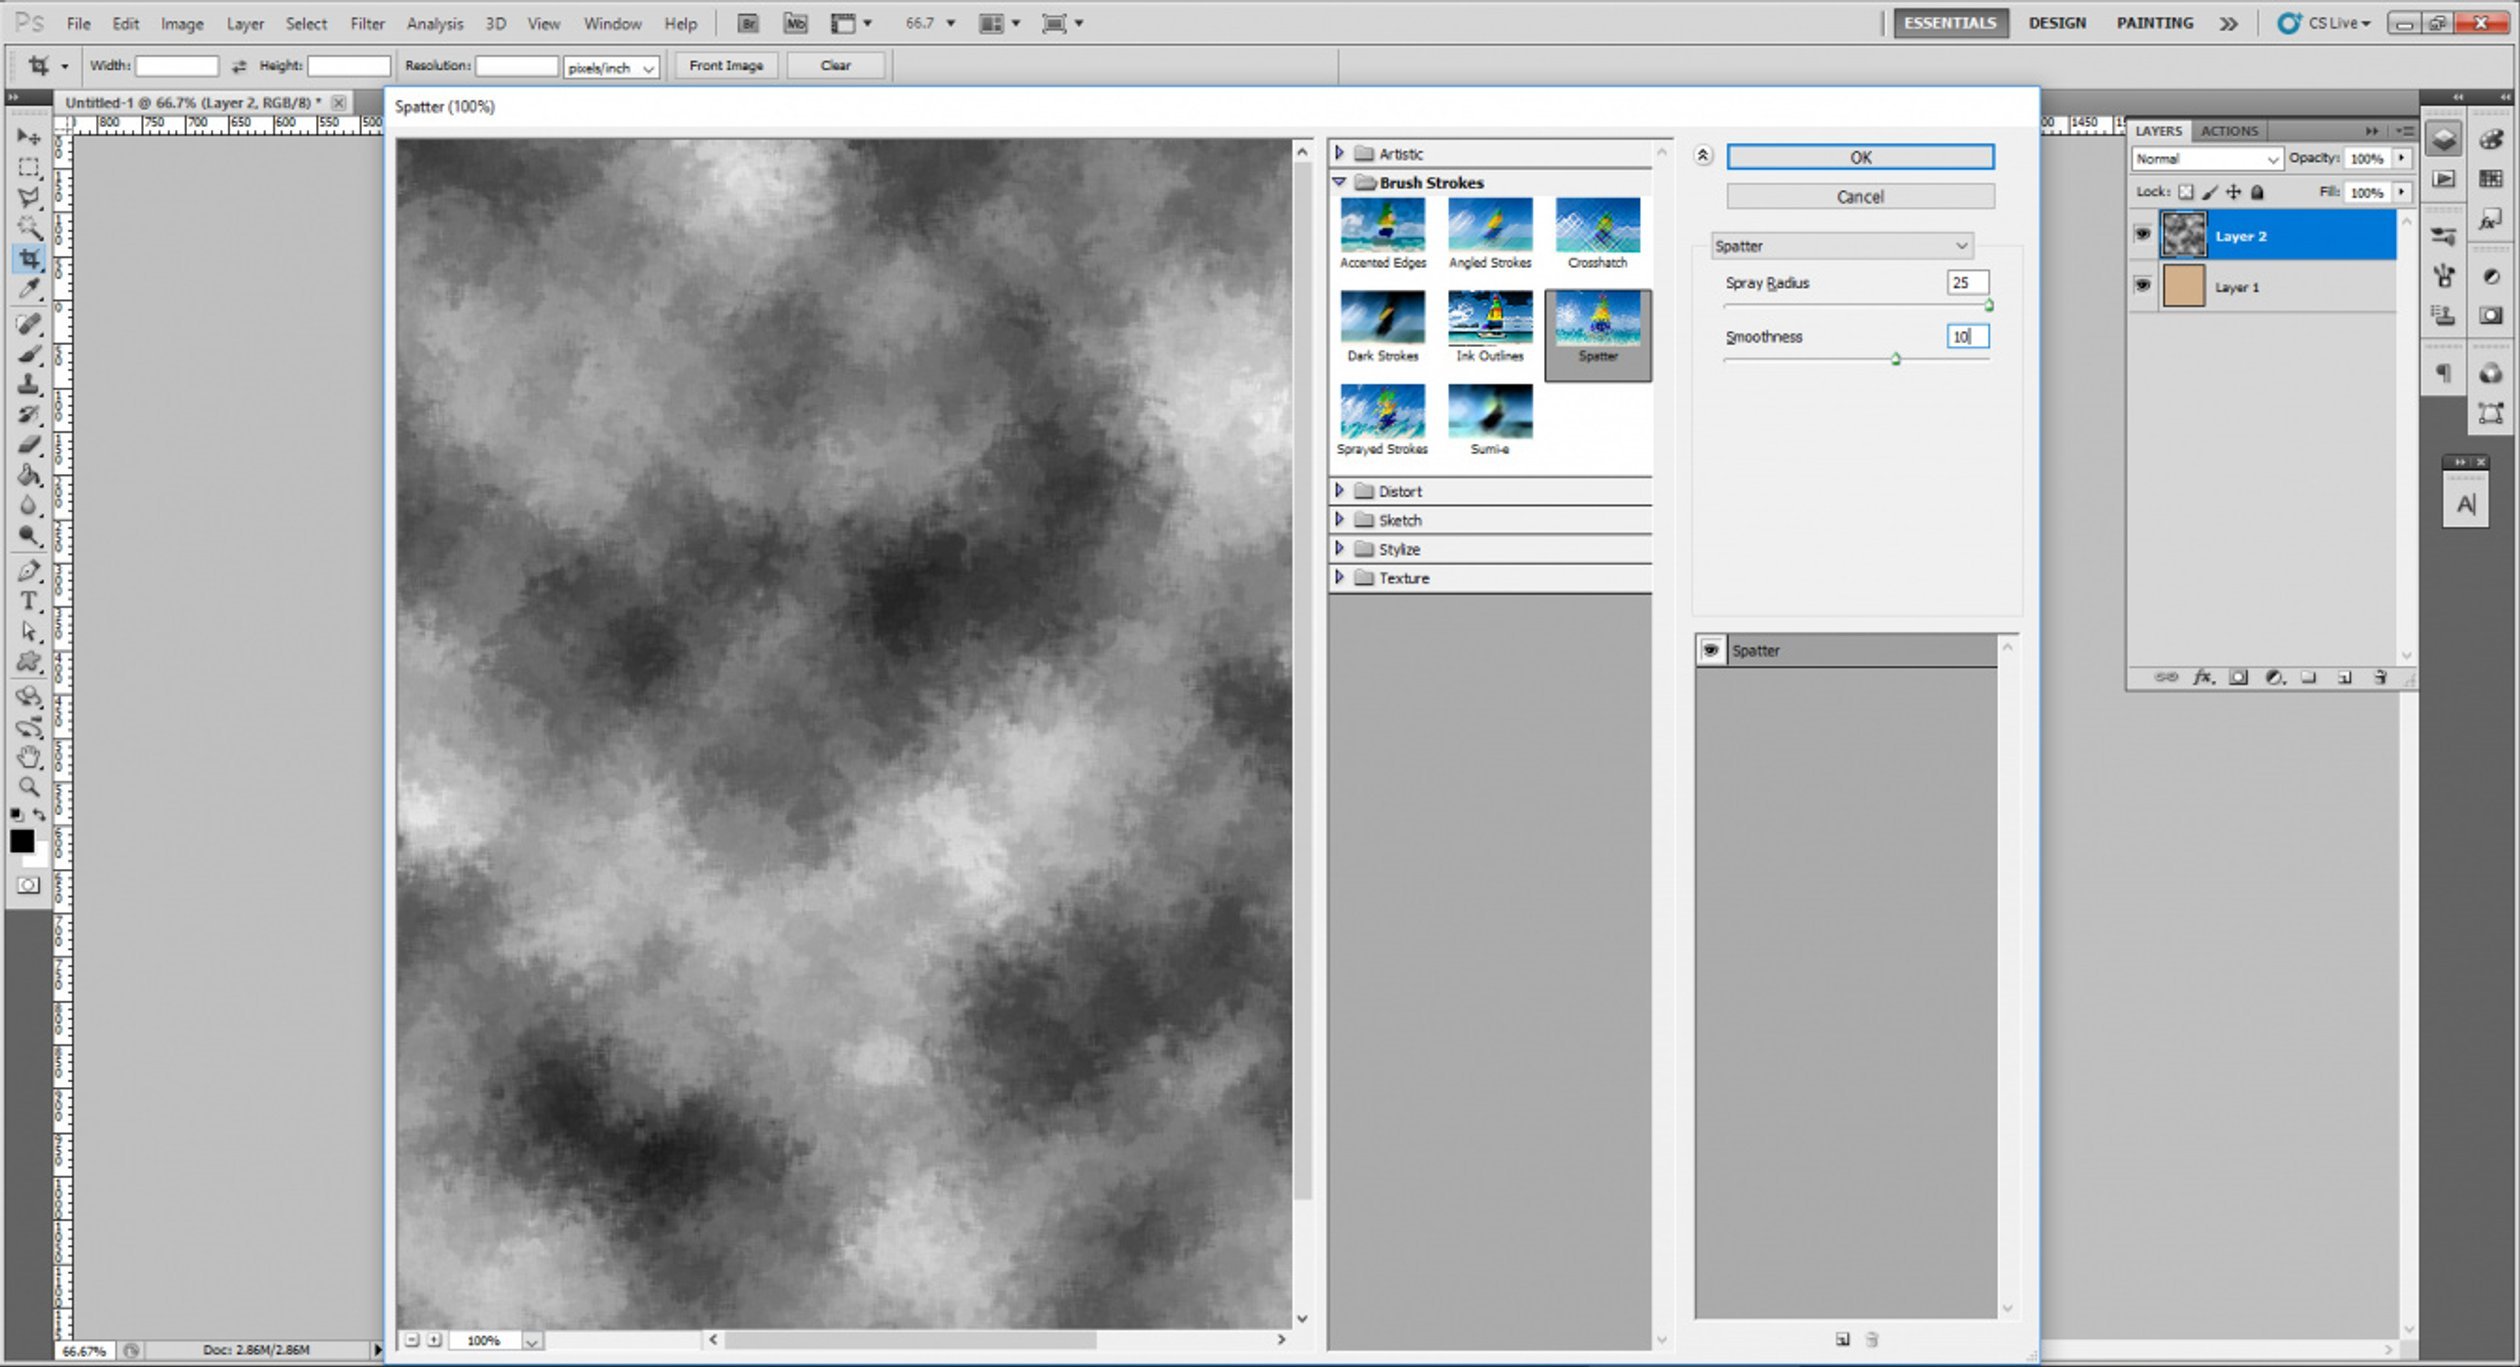
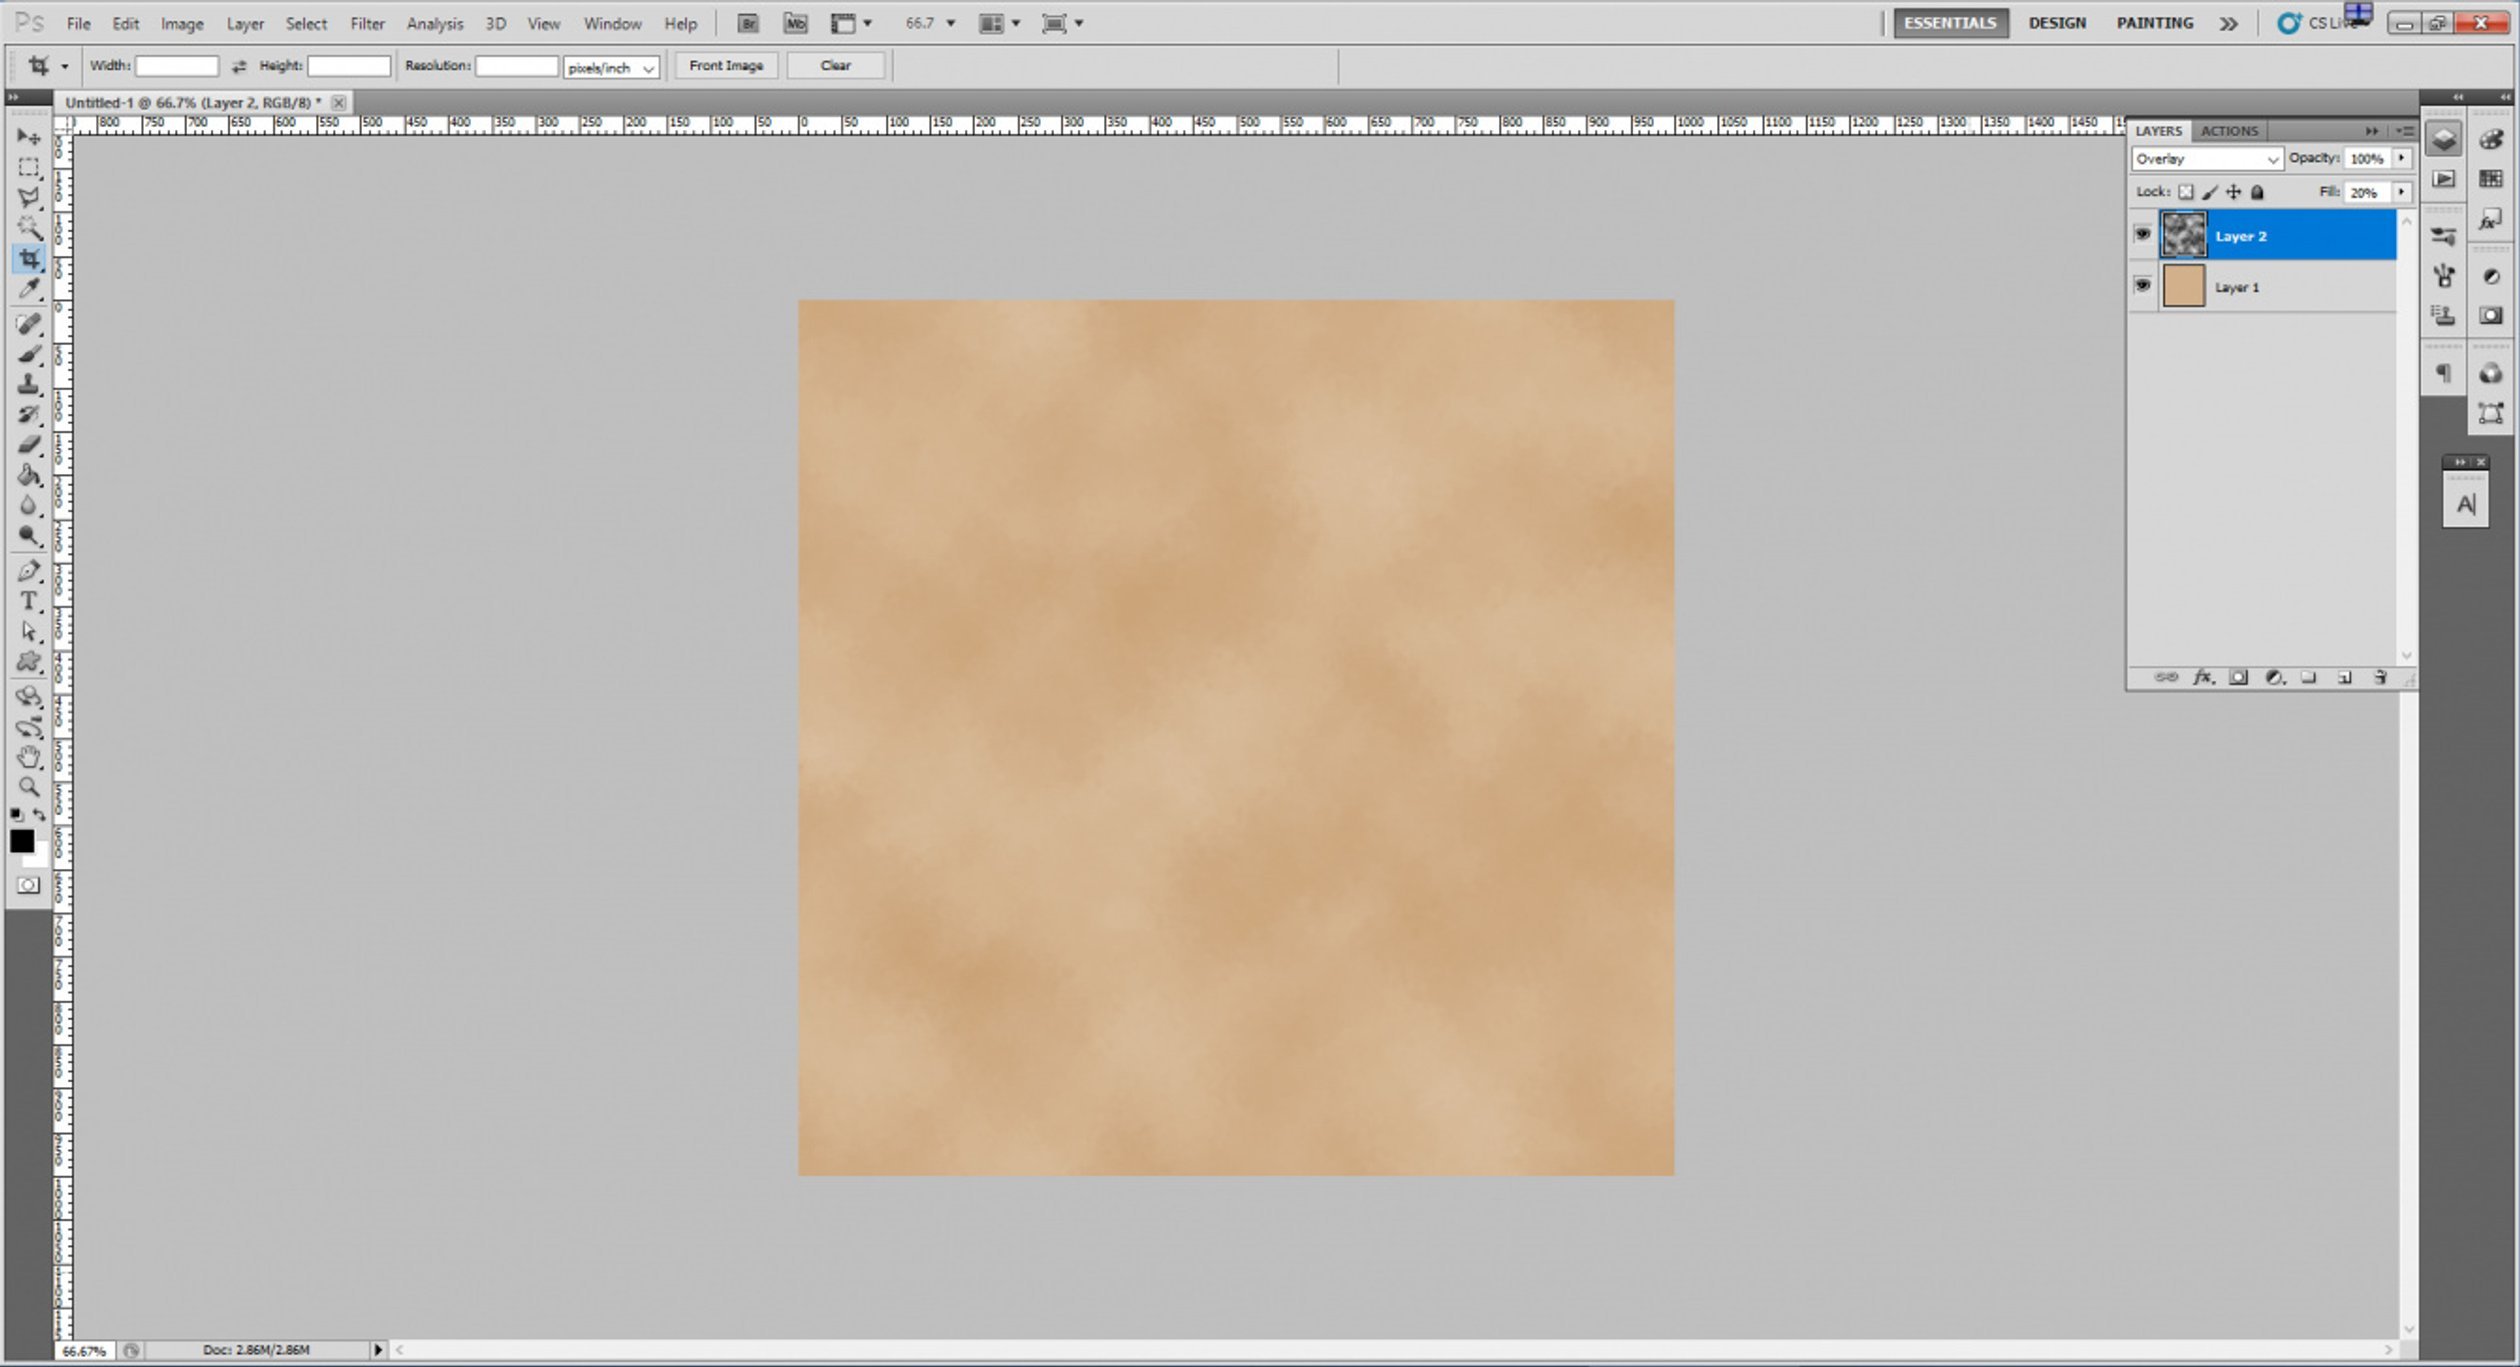
With the second layer still selected, apply the Spatter filter: Filter > Brush Strokes > Spatter. Gear up the spray radius to 25 and the smoothness to ten. Once the Spatter filter has been applied, modify the layer mode to overlay. The image should now showtime to resemble old paper. The above settings are preferable, as anything larger begins to resemble something completely different.
iv. Create a new layer and utilize the Clouds filter
Create a third layer on top of the second layer. Brand sure the colour pallete is even so set to black and white, then apply the Cloud filter once again.
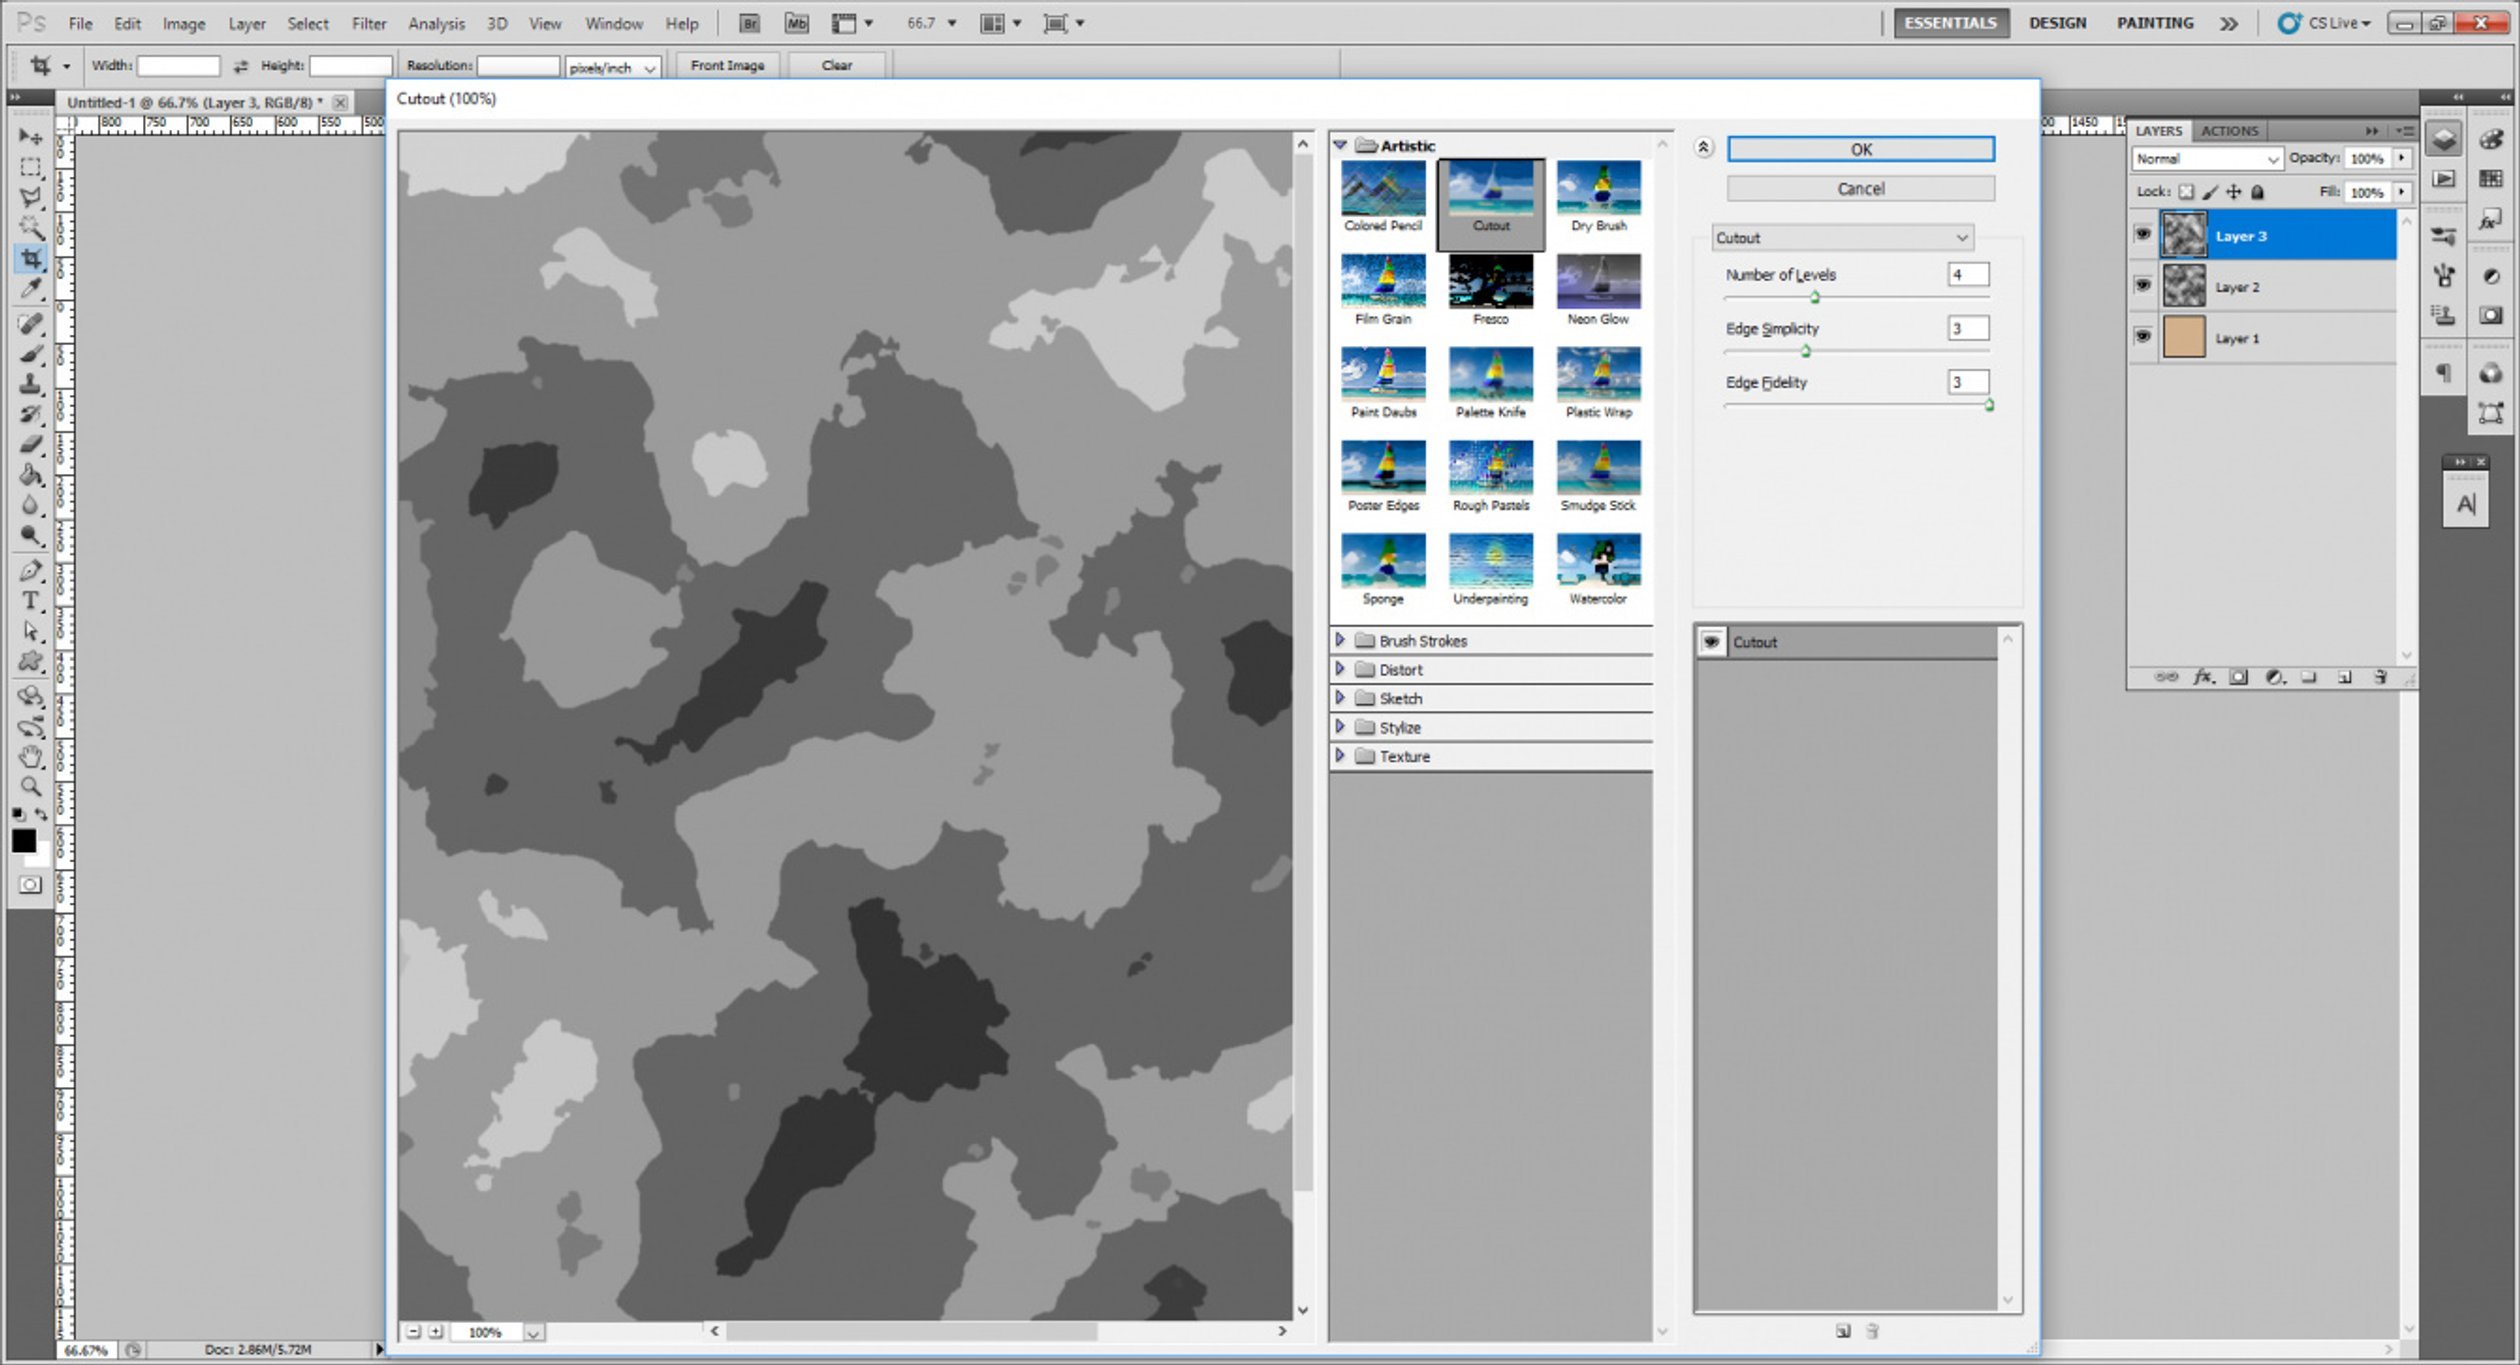
v. Utilise the Cutout effect and change the overlay mode
With the third layer all the same selected, apply the Cutout filter: Filter > Artistic > Cutout. Set the number of levels to 4, the edge simplicity to 3, and the border fidelity to three. Once y'all've practical the filter, change the layer mode to overlay. By now, your image should strongly resemble the texture of former paper. The cutout effect is intended to mimic stains on the paper.
6. Merge layers
When steps 1 through 5 have been completed, you can merge the existing layers. Simply click on the drop-down arrow next to the layers panel and select Merge visible. This will flatten your paper texture and leave i layer to work with. Don't cull any of the other options — yous still want the layer to be editable and not locked equally a background.
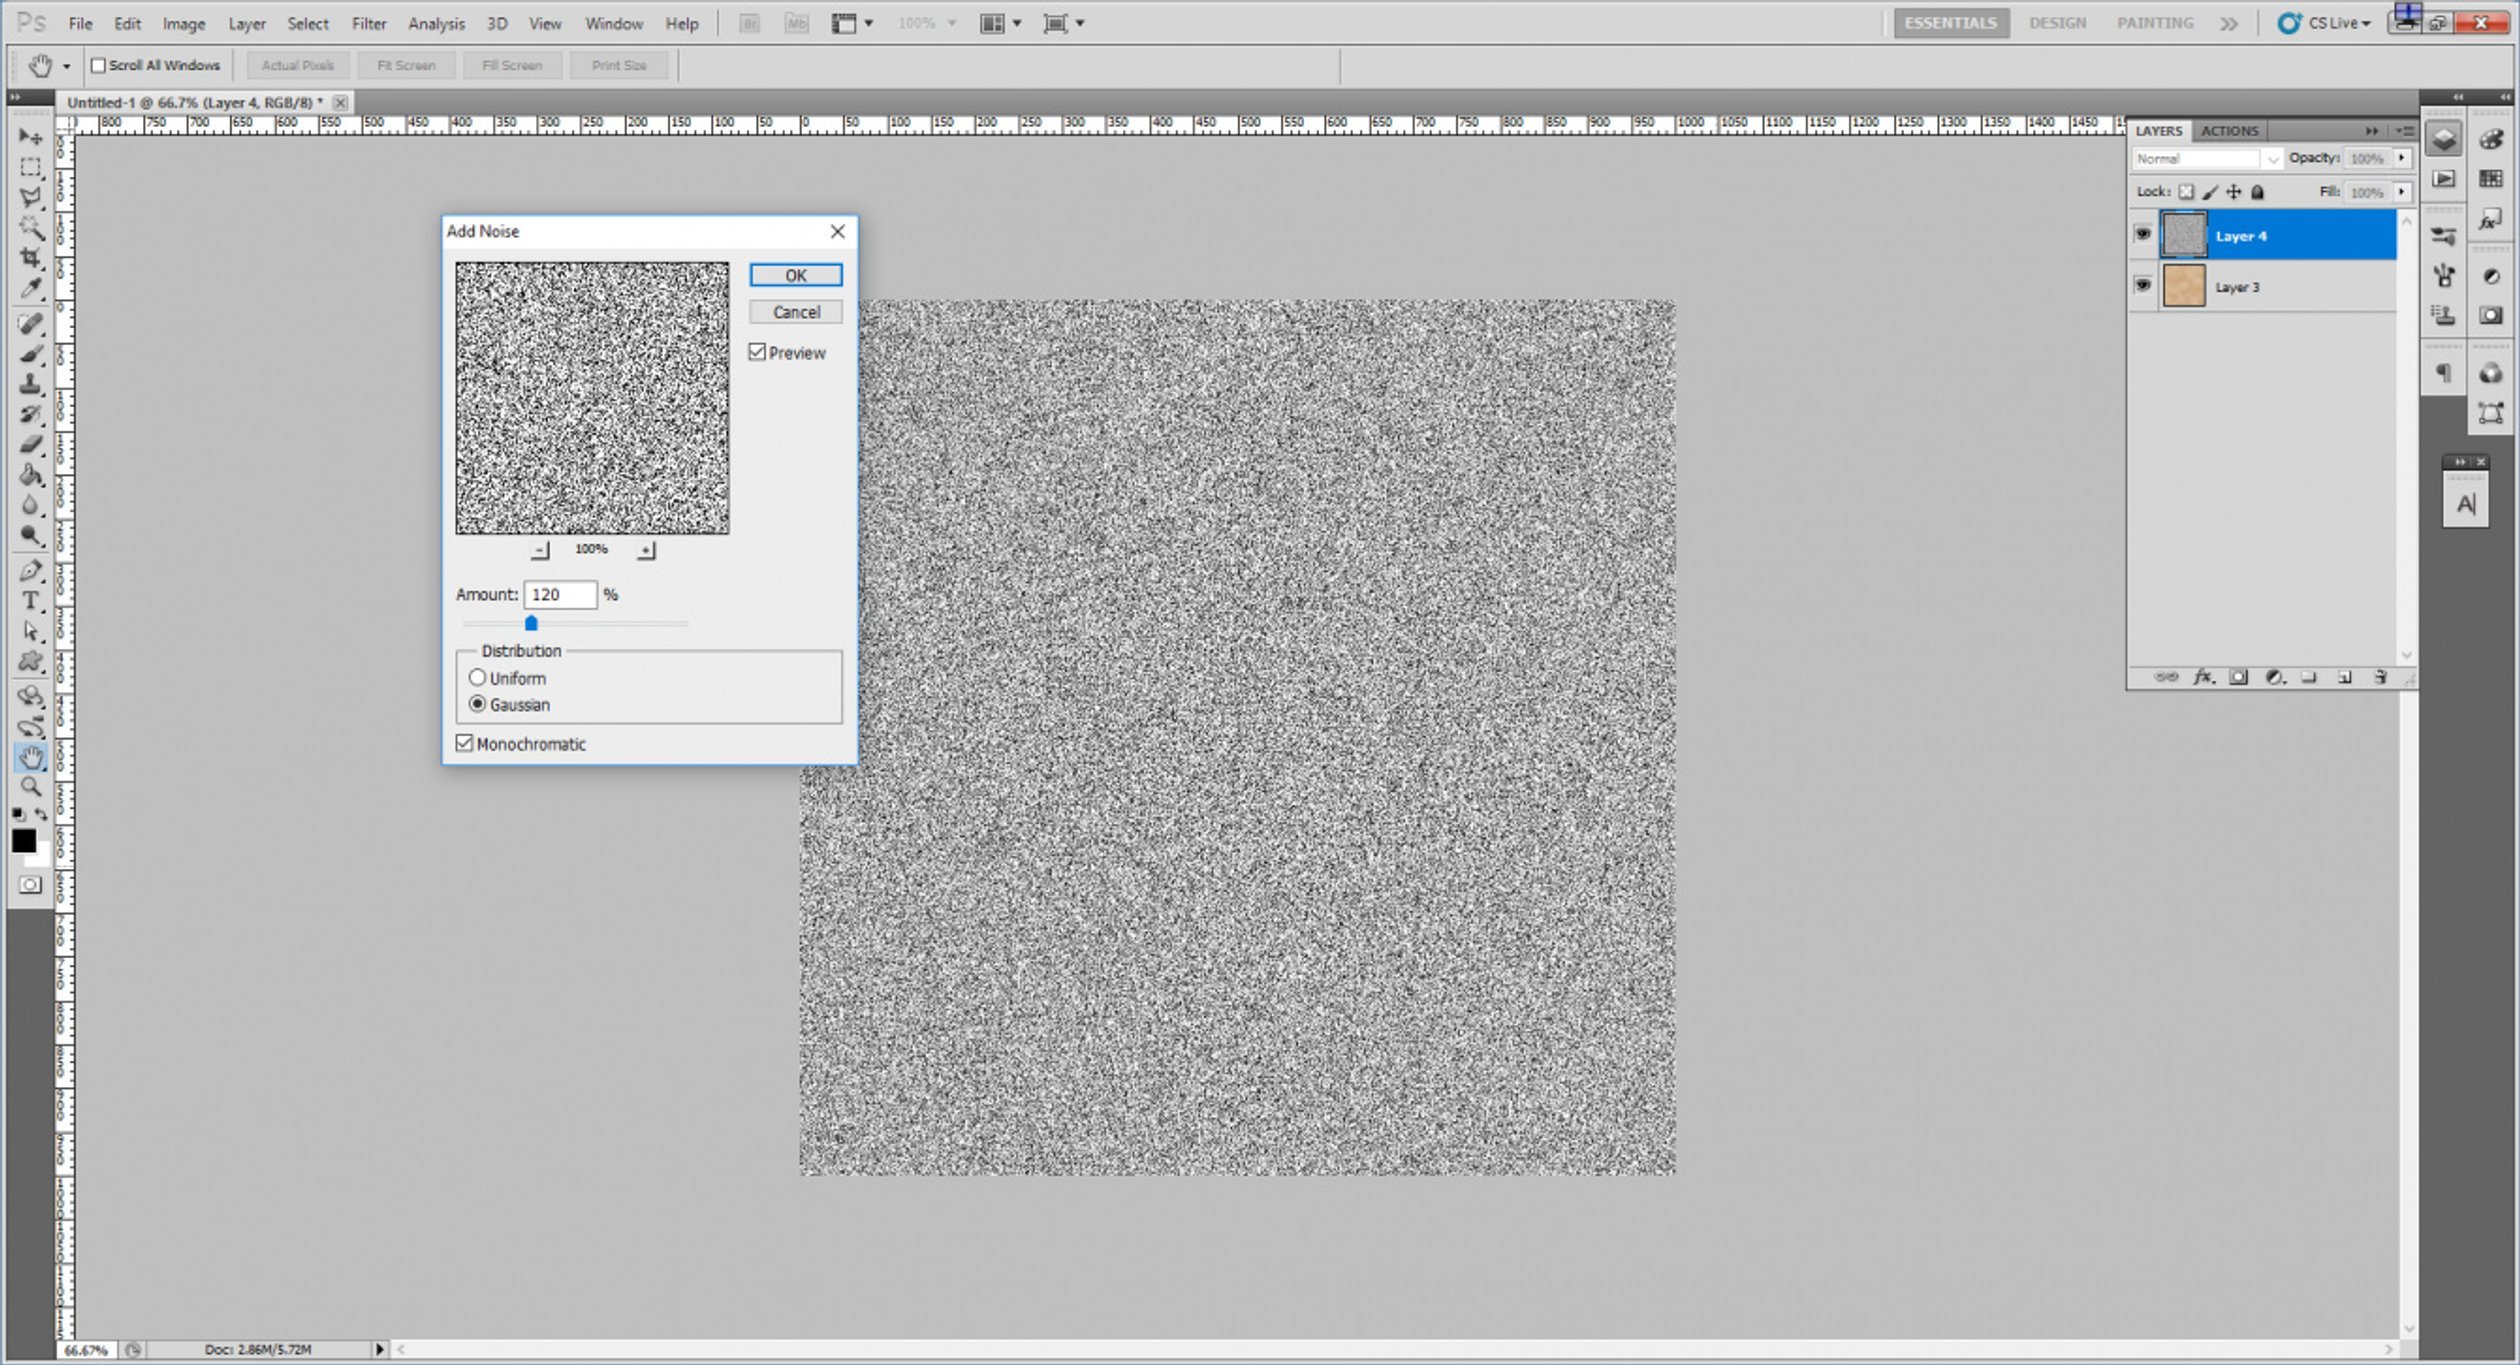
7. Create a new layer, fill information technology, and apply the Noise filter
The final stage involves calculation textured grain. Create a 2nd layer on acme of the layer you lot've just merged. With the 2nd layer selected, utilise the Noise filter: Filter > Dissonance > Add Noise. Alter the corporeality to 120% and the distribution to Gaussian. Brand sure the Monochromatic box is ticked — this ensures that the racket is black and white. At present change the layer way to overlay and reduce the opacity to between ten% and 15%.
8. Flatten the prototype and save
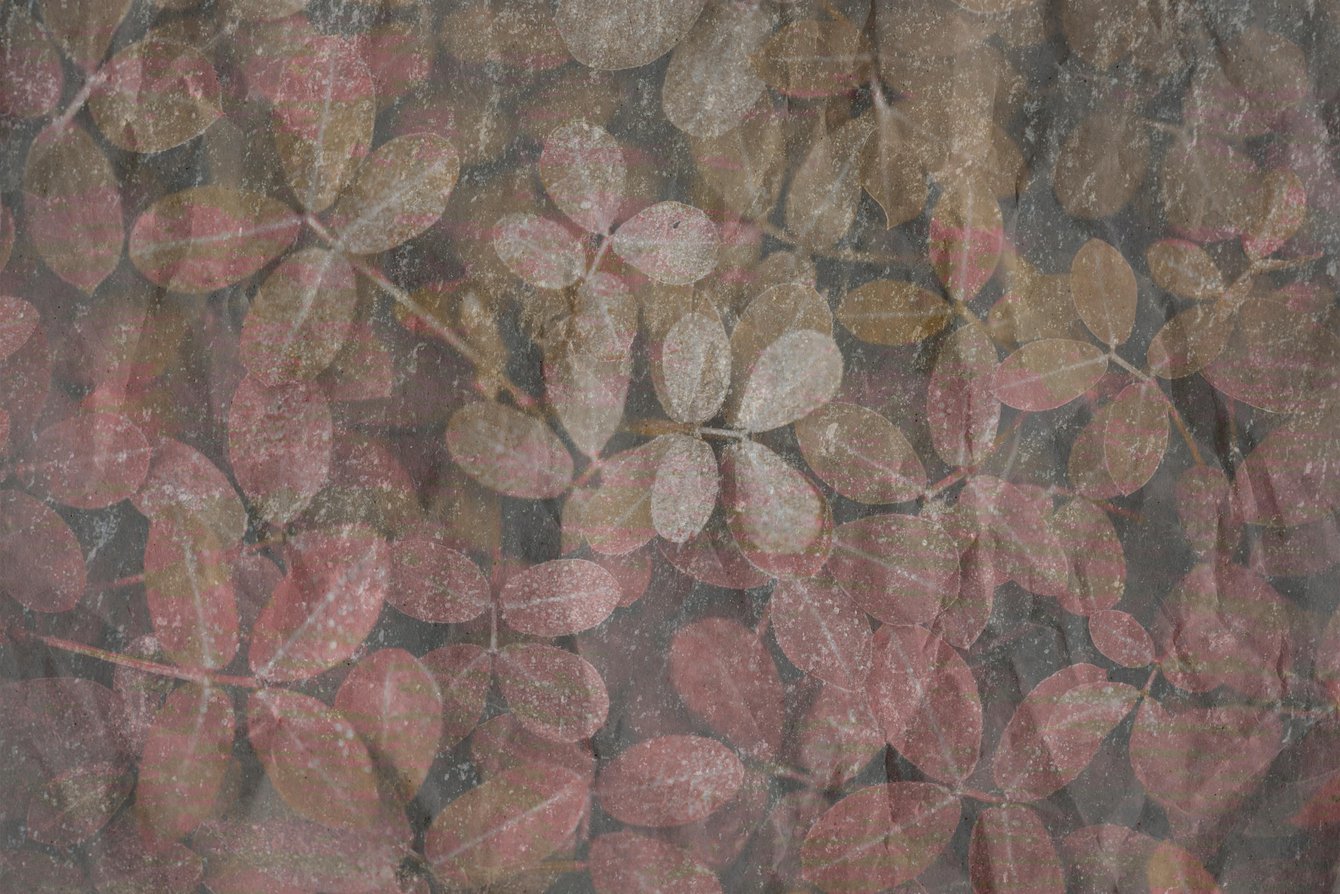
Your image should now resemble a paper texture or a wrinkled paper texture depending on how y'all look at it. Below is an example of the last image:
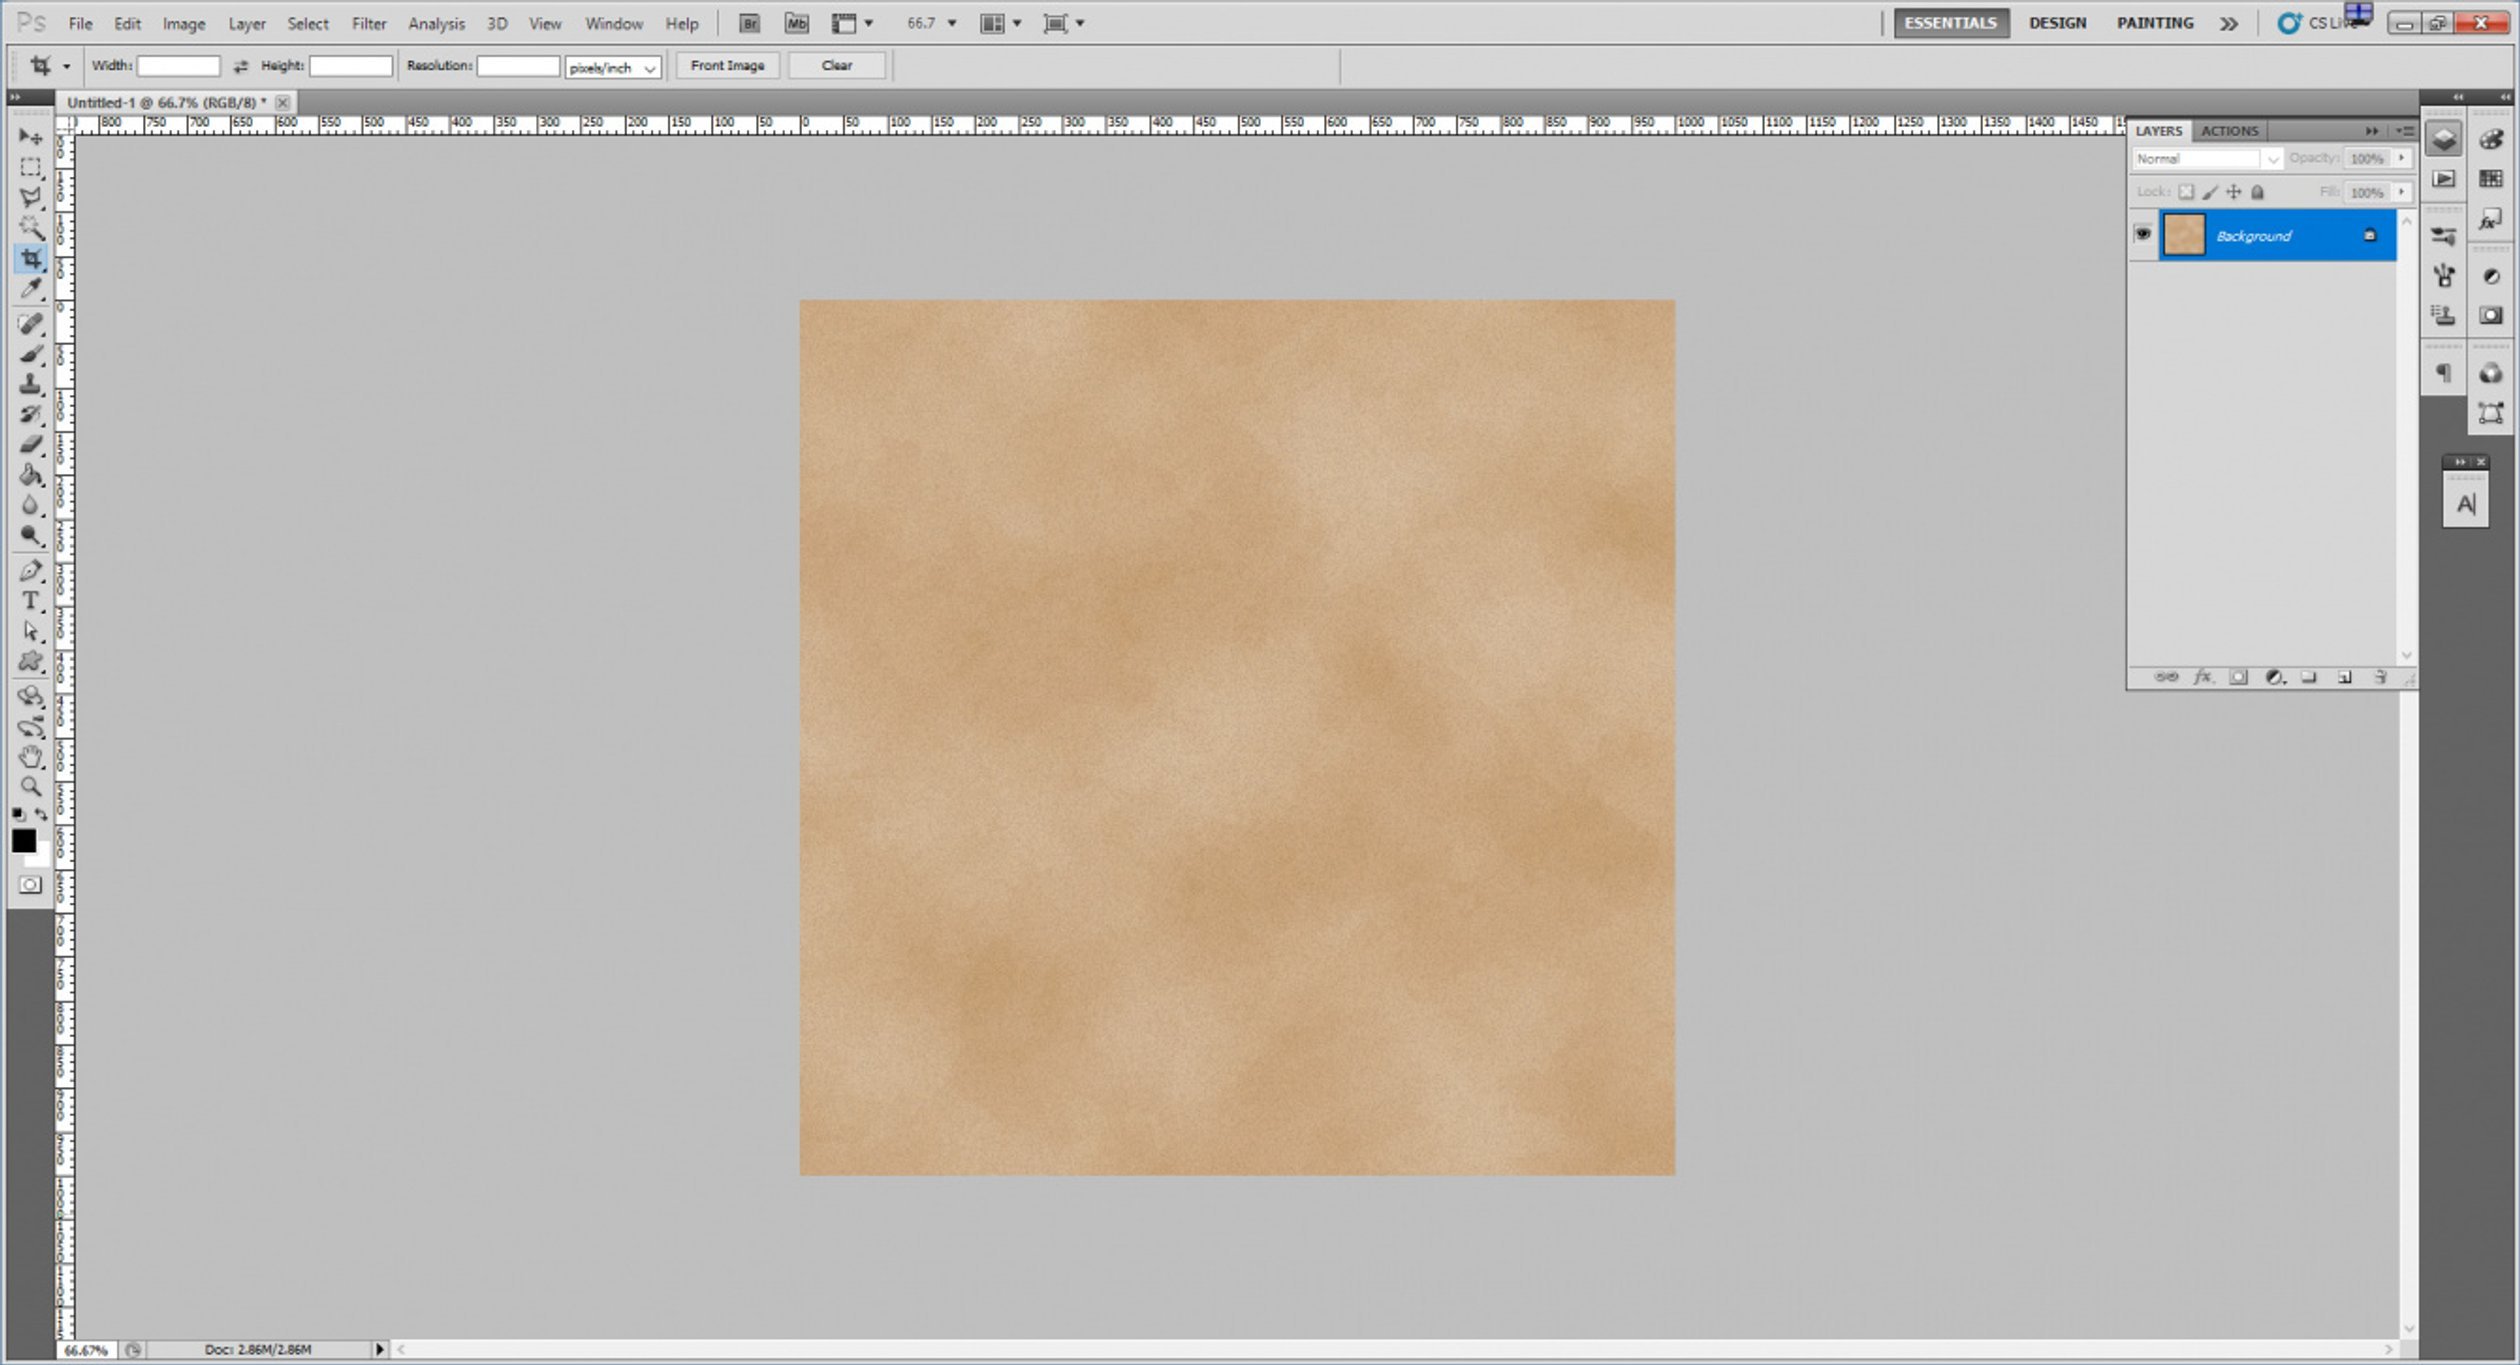
The settings nosotros've chosen here provide you with a natural old paper texture. You can change the initial background color. Furthermore, you lot tin can alter the settings of the spatter and cutout furnishings to requite a different vintage paper texture. You can then use this epitome for any number of purposes. For example, you lot can utilize it as a brush to add texture to your photos. Alternatively, you can apply it to create a vintage-manner photo for marketing pieces.
How to add together an erstwhile paper texture to an image in Luminar
At present that we've seen what Photoshop tin can practice, how does this process look in Luminar? The section beneath describes how to add an old newspaper texture (such as the 1 we only created in Photoshop) to an image in Luminar.
Method 1 — Blend an old paper texture as a new layer
- Open your target image in Luminar.
- Add together a new paradigm layer above the original background image.

The prototype you lot select for the next layer should be the texture yous wish to apply, for example the sometime newspaper groundwork we created in Photoshop. This texture will cover the original image.
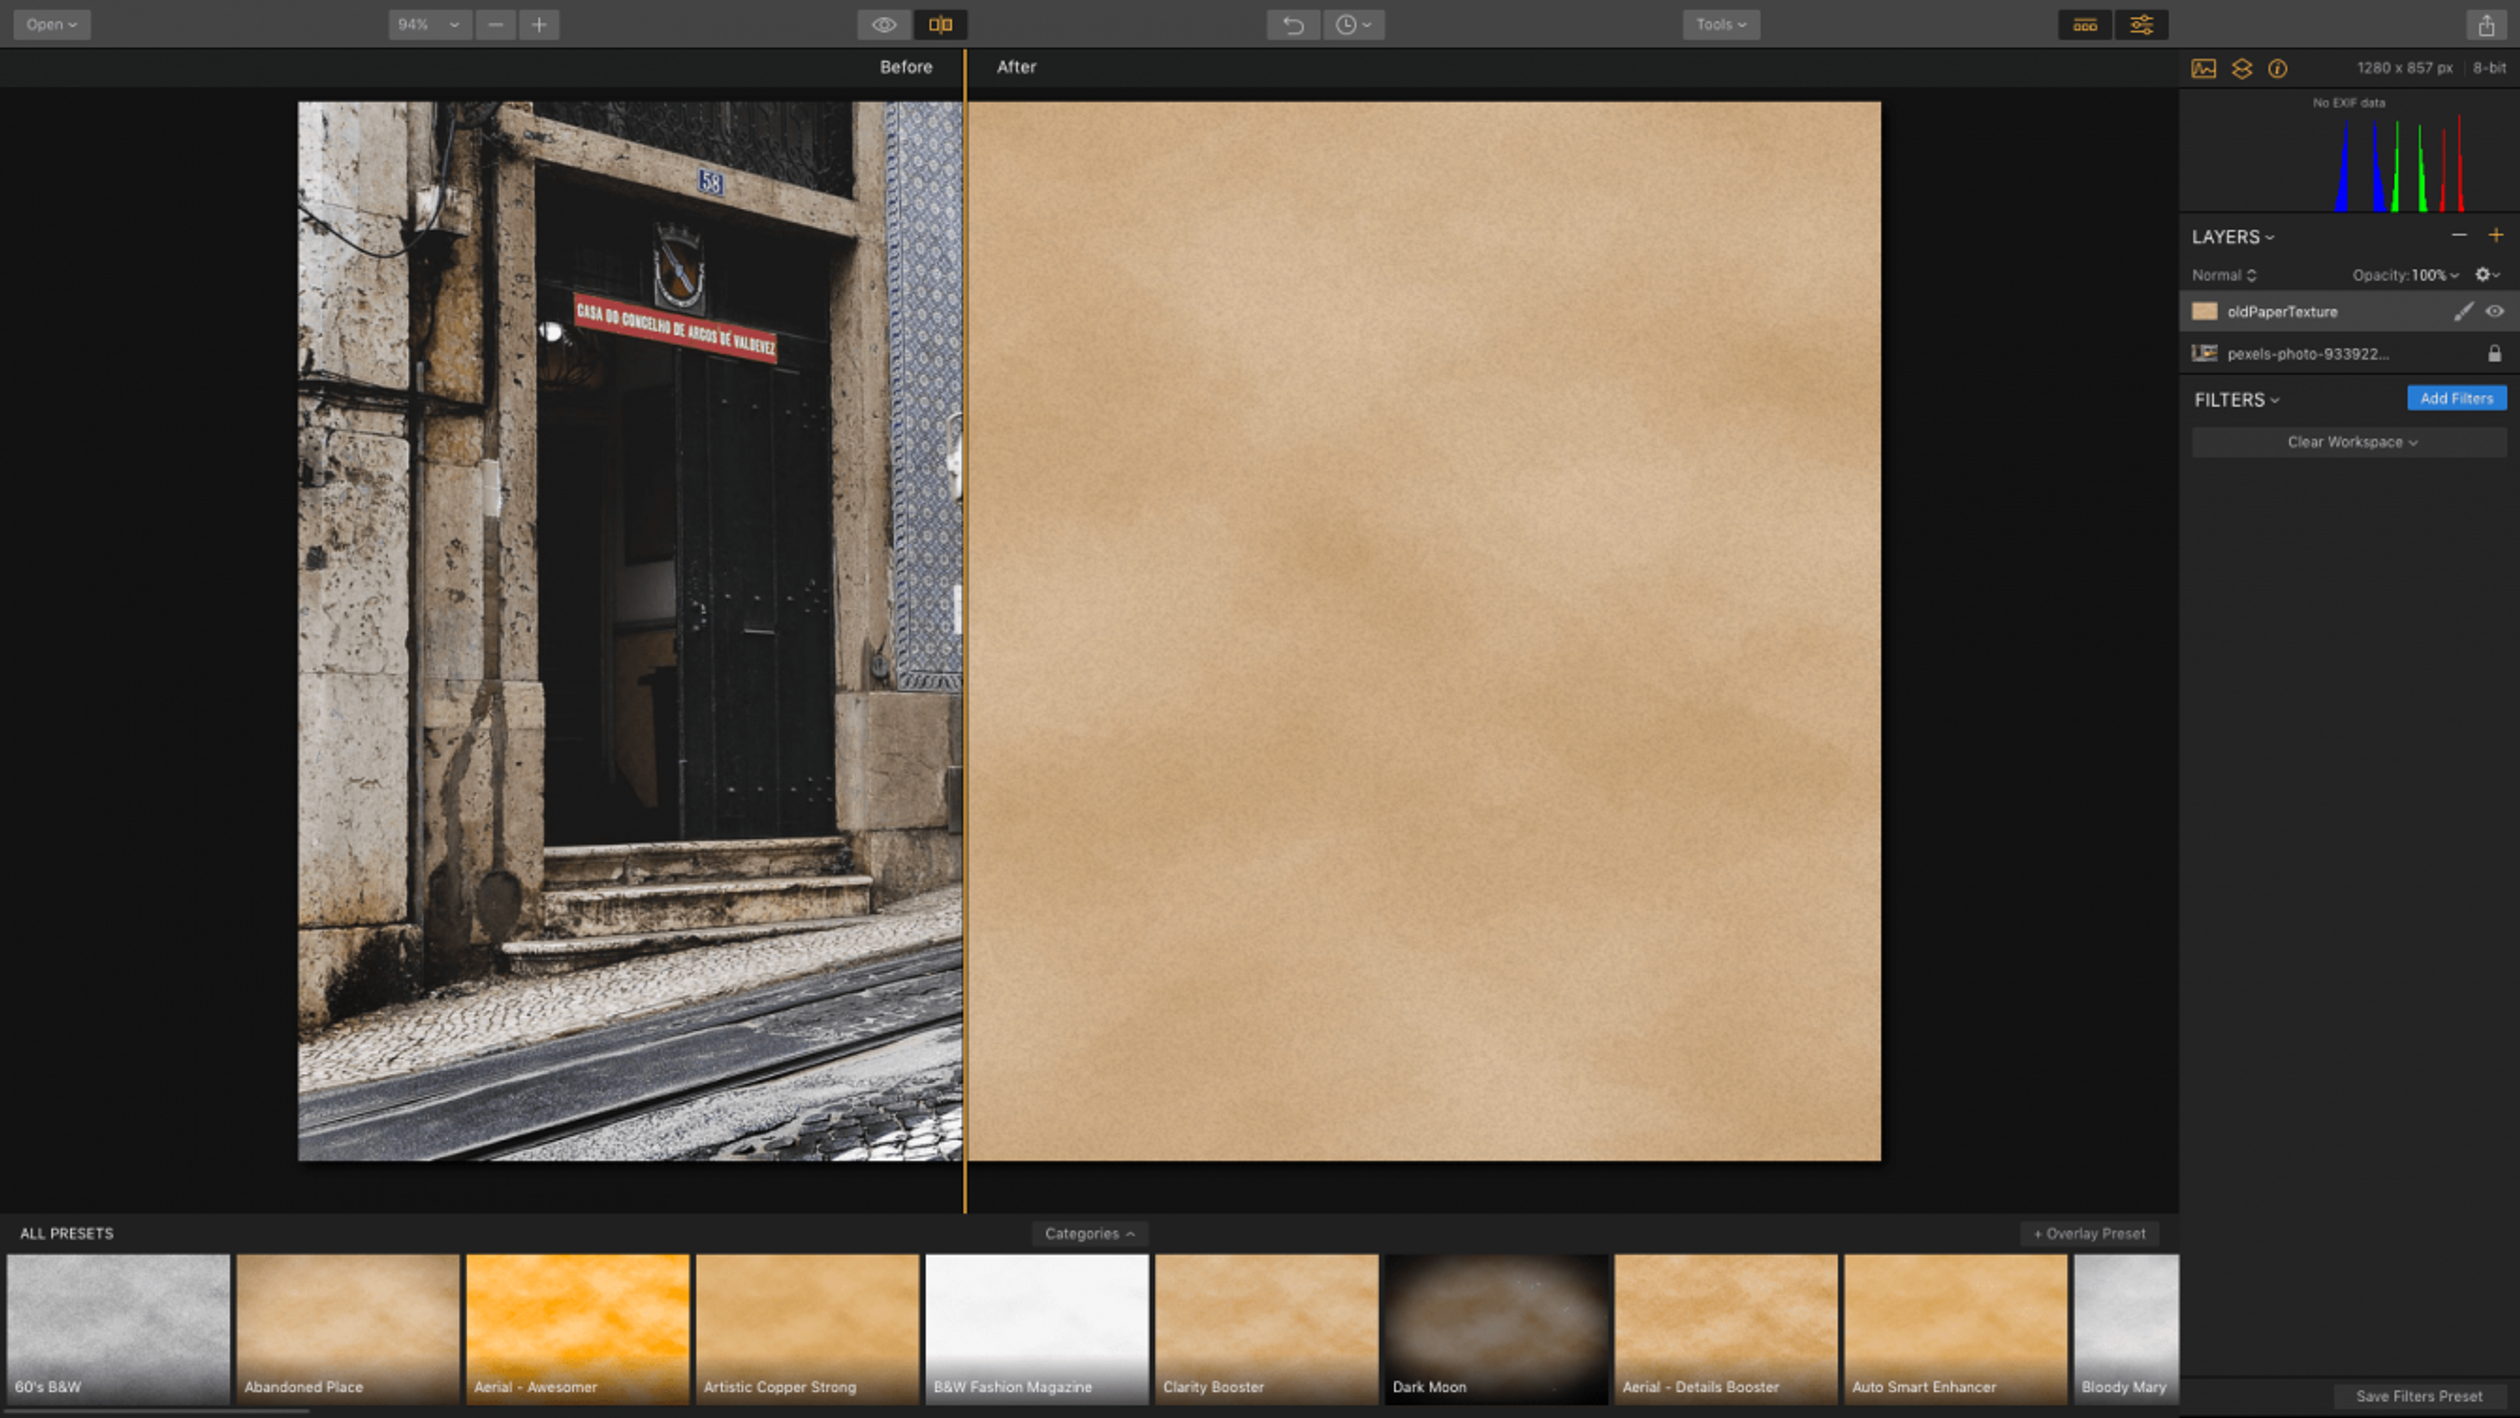
- To make the original epitome visible through the texture, simply reduce the opacity of the texture layer. Try different opacities to see what effect it creates with the original image and texture.
- If the texture doesn't look right, you can change the layer mode. Unlike layer modes will blend the old paper groundwork into the original paradigm in different ways. Several layer modes piece of work particularly well for this, including Overlay, Hue, and Darken.
- When y'all've establish a suitable balance, salvage the image.
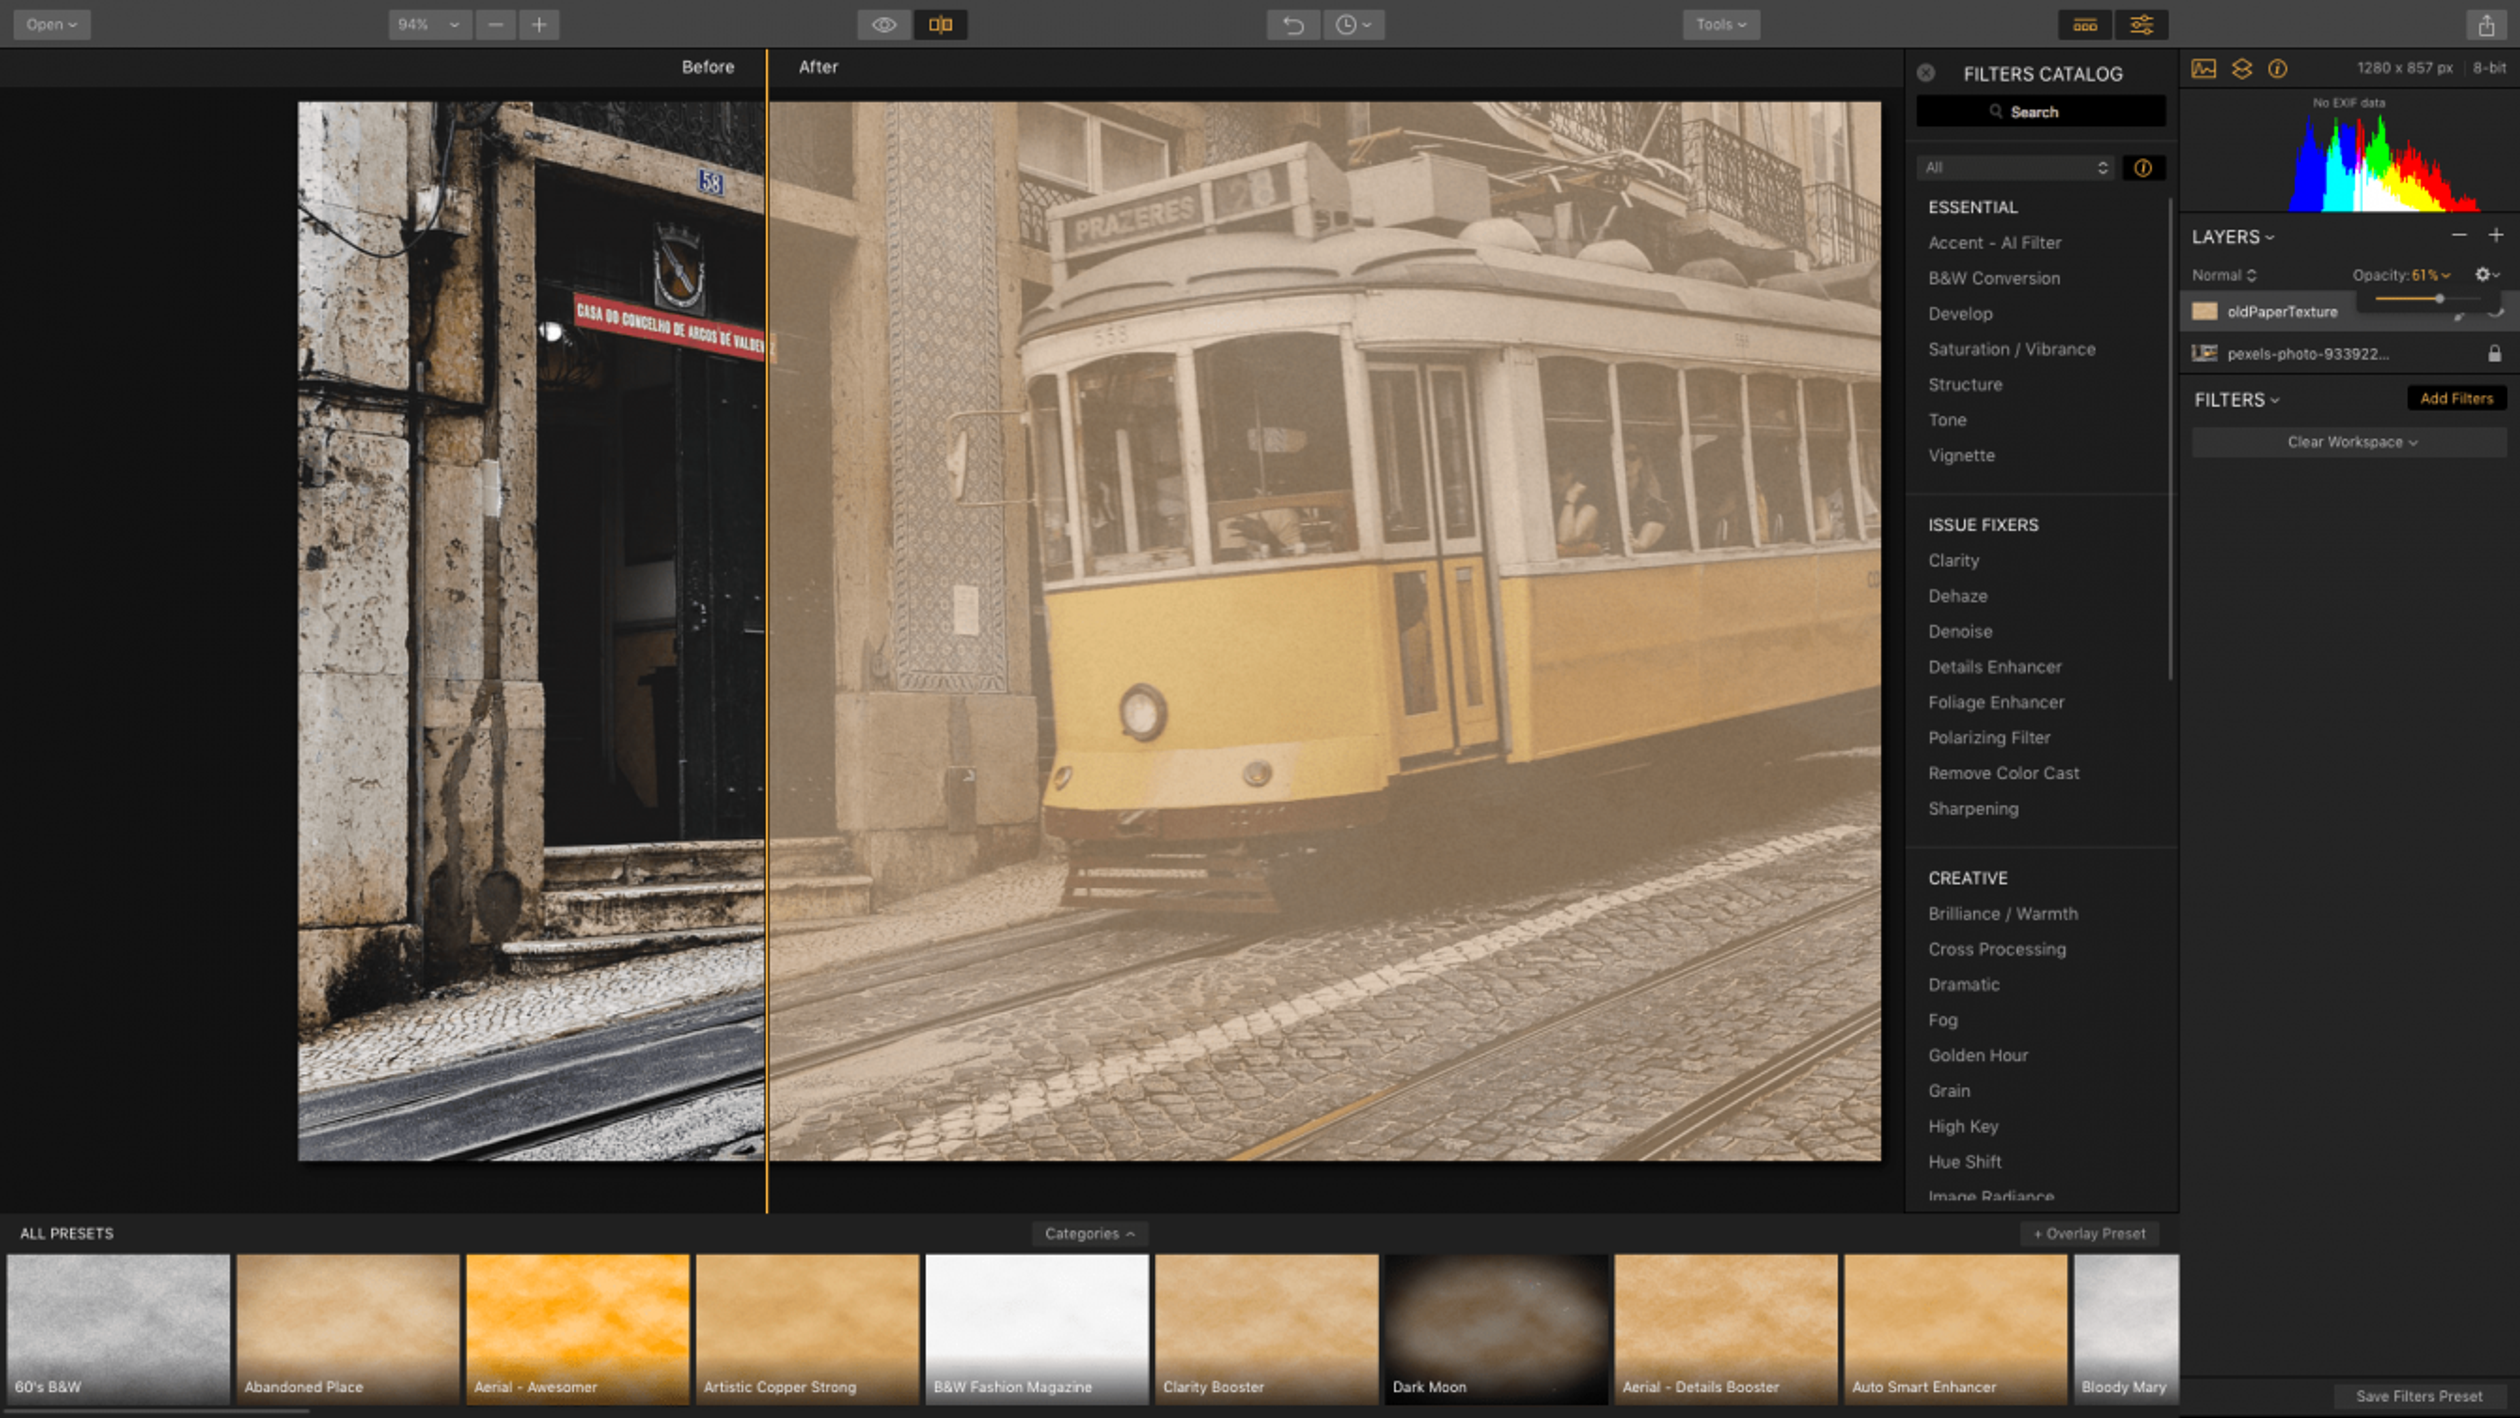
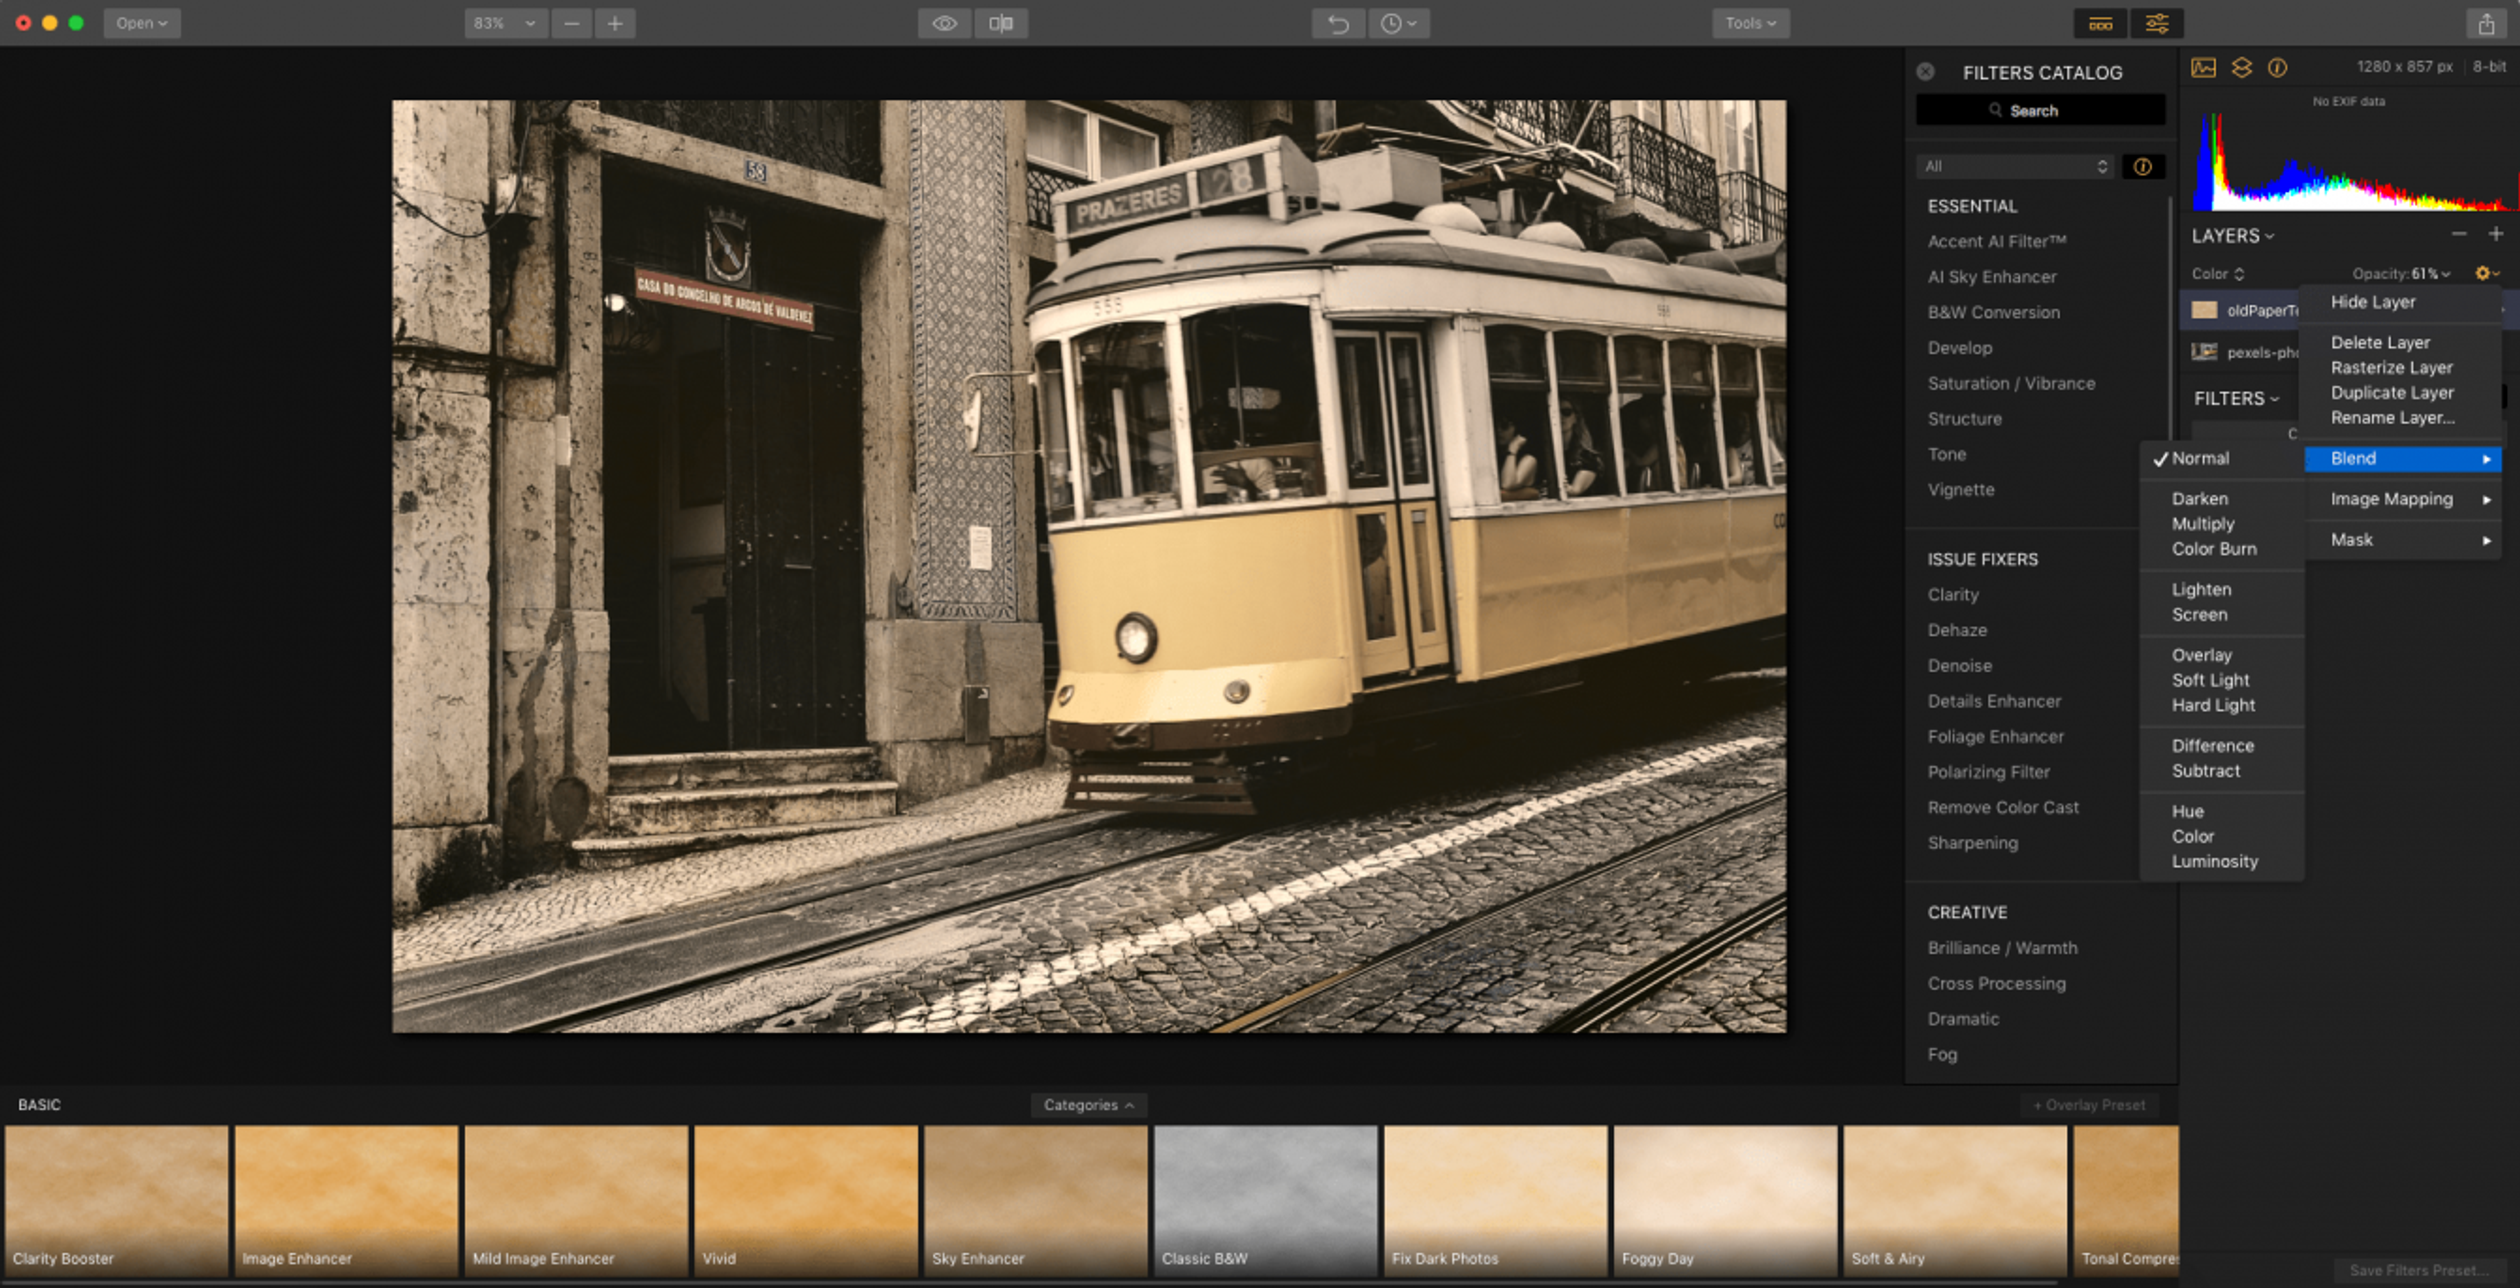
This method is extremely quick and easy — you can apply a texture to your epitome using Luminar in a matter of seconds. Furthermore, the different blend modes requite great flexibility. Yous tin do good from these and other features if y'all purchase a full license for the Luminar suite.
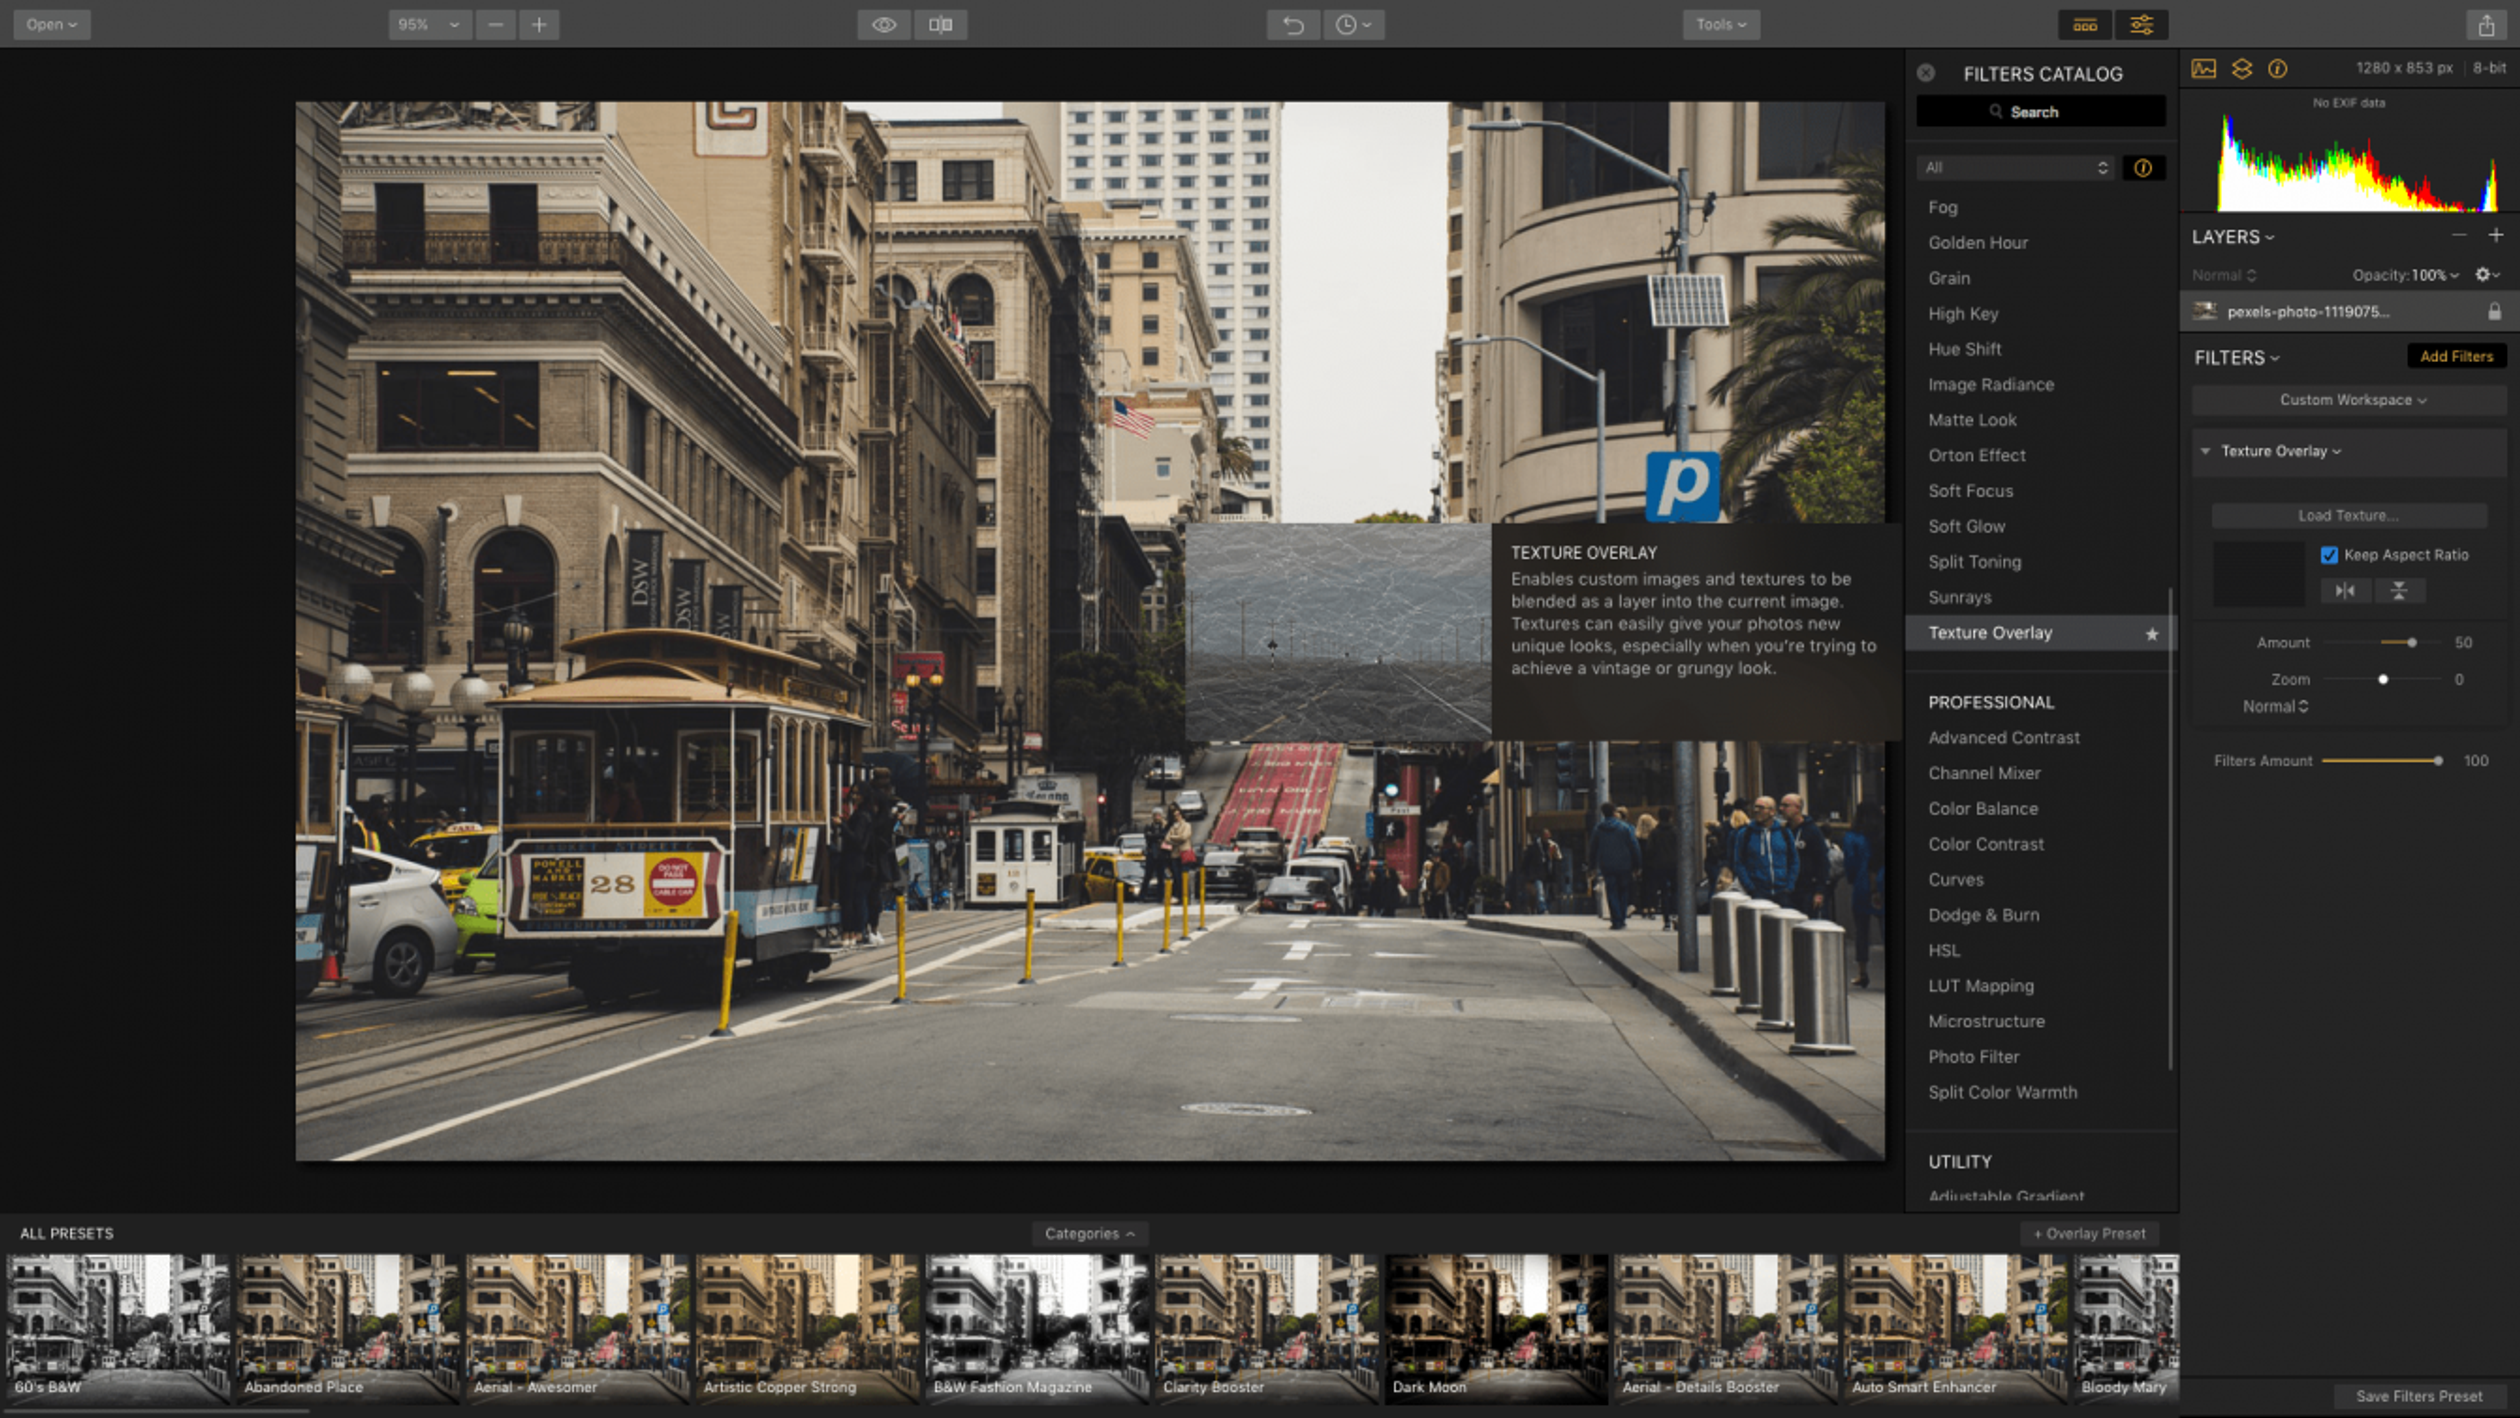
Method 2 — Using the Texture Overlay filter
- Open your target image in Luminar.
- Click on Add filters to open the filters toolbar.
- Select the Texture Overlay filter in the Artistic category.
- From hither, yous tin load your old paper texture by clicking on Load Texture and selecting the image file from its saved location.
- Once the former paper groundwork has been loaded, you can toggle the filter settings. The amount setting changes the opacity of the texture, pregnant how visible it is in comparison to the original paradigm. Zoom increases the size of the texture. Information technology'due south also possible to modify the blend mode of the texture in the same manner equally in the first method.
- When you're happy with the residuum of the texture, simply relieve the image.
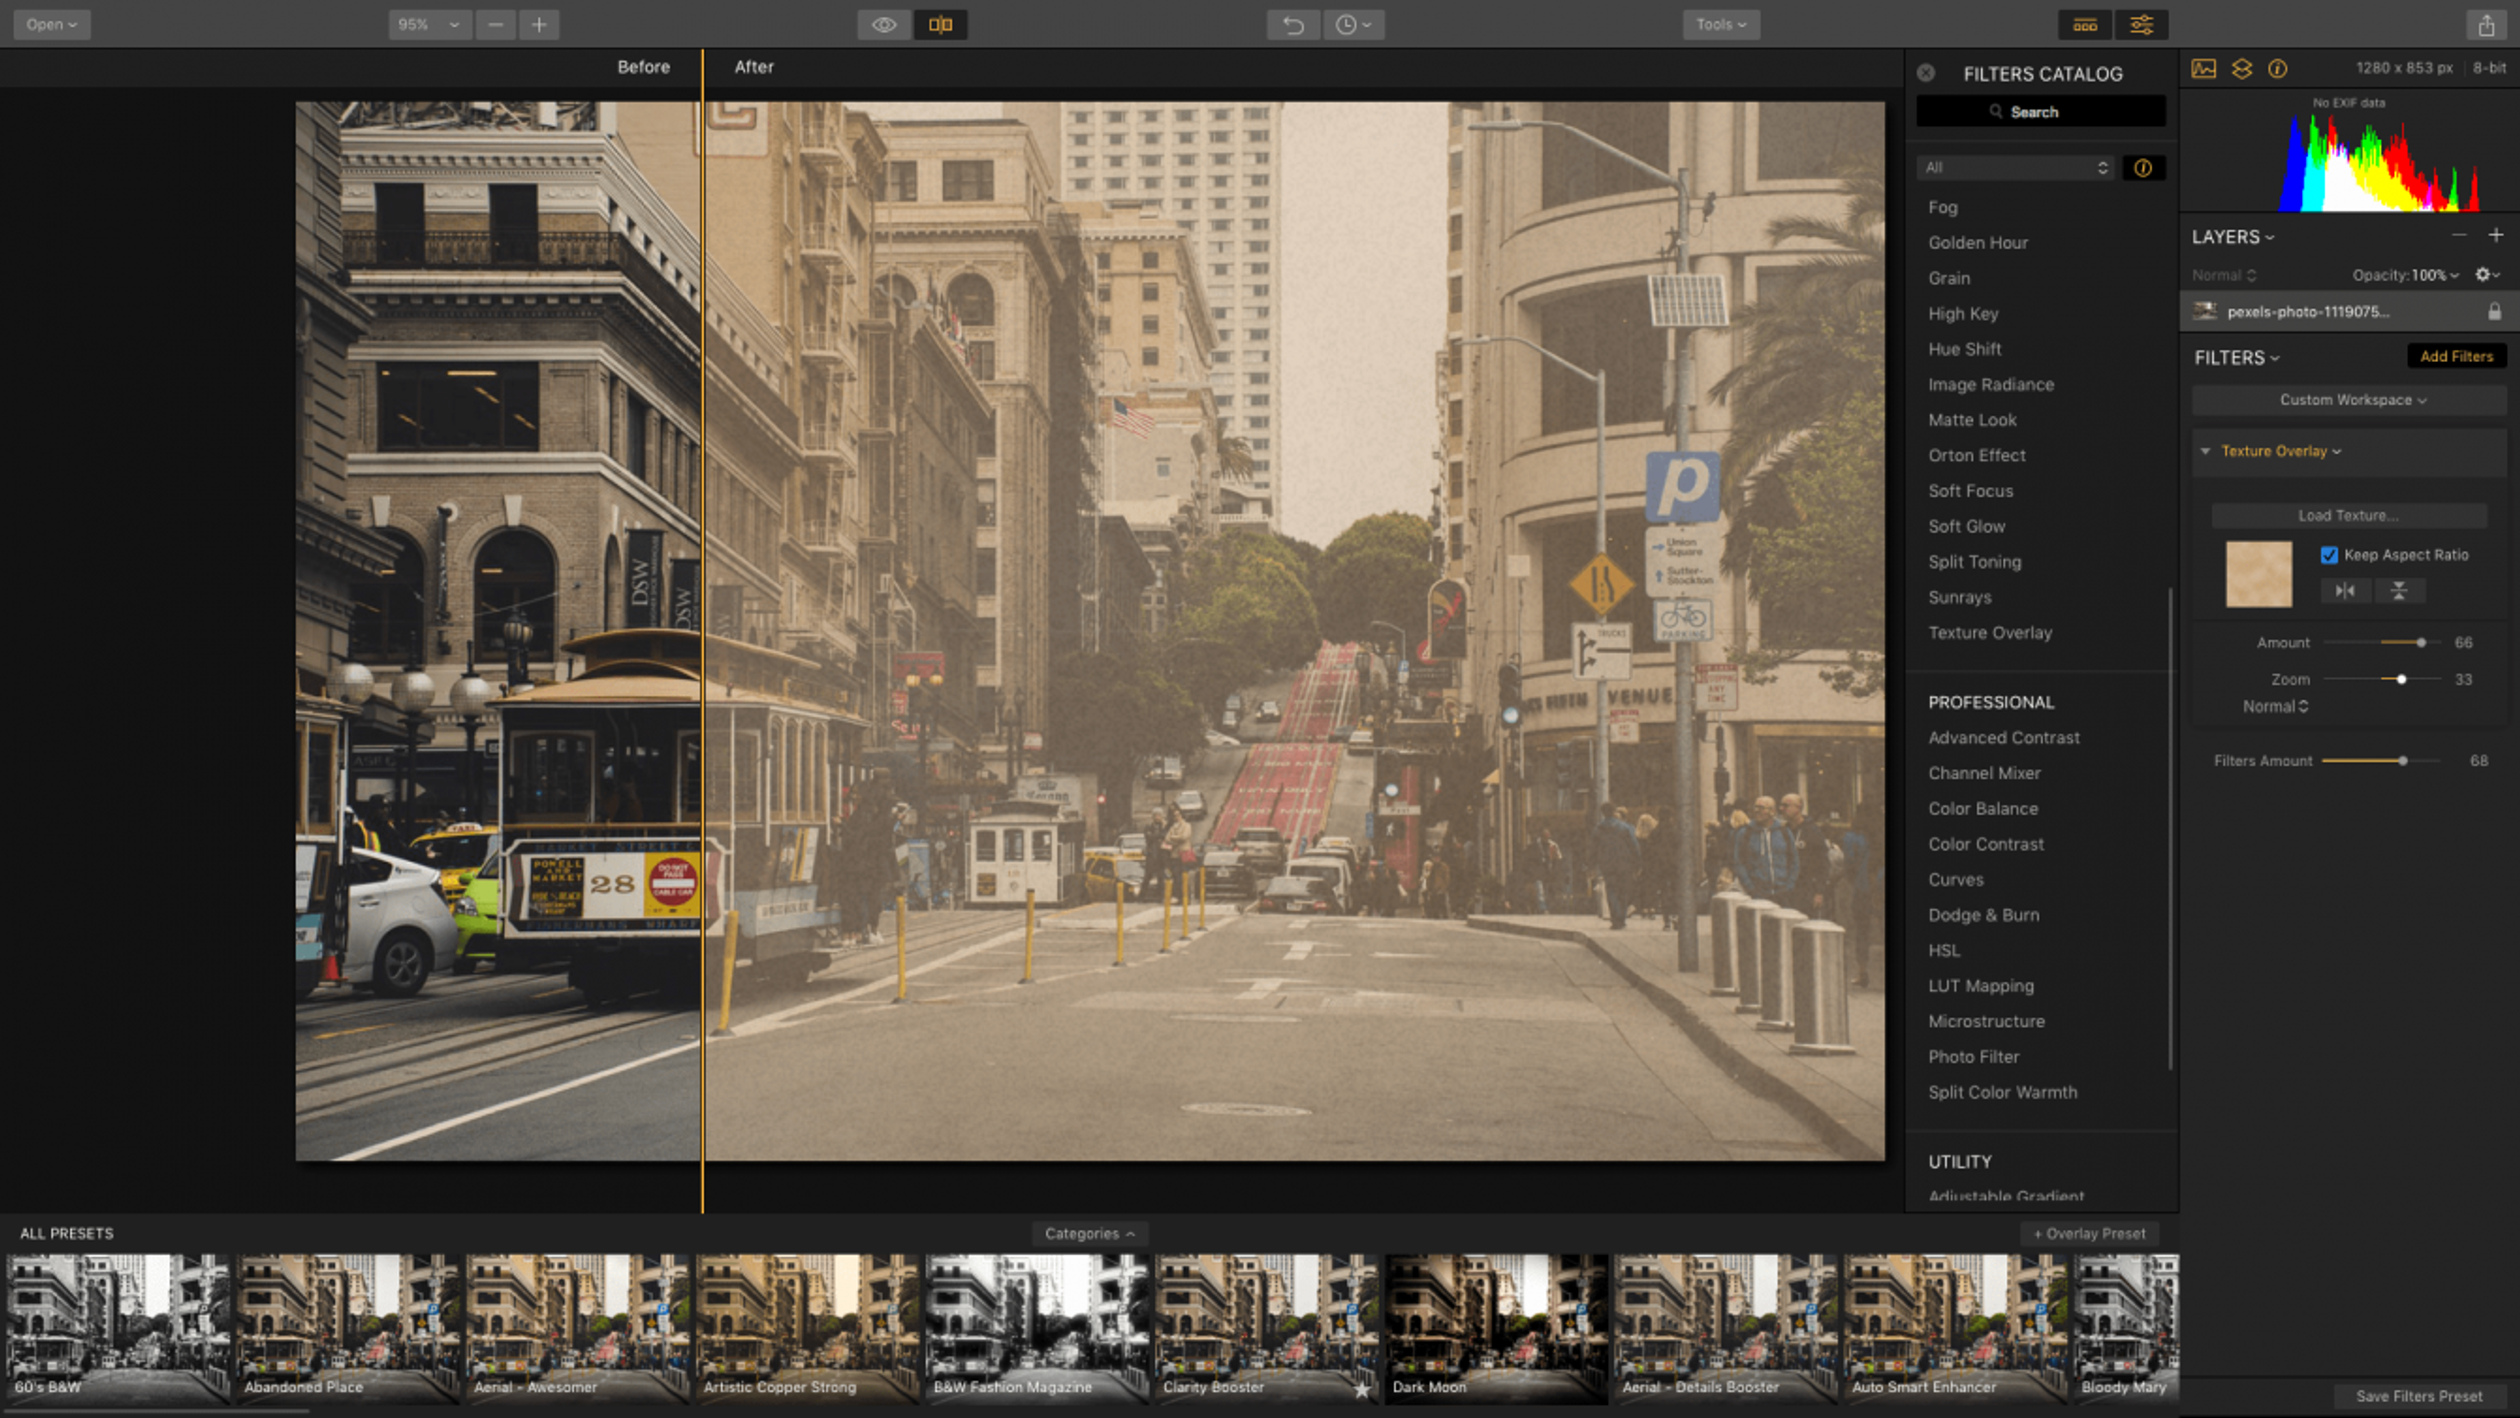
As y'all tin can see, it'southward only as easy to apply an old paper texture in Luminar equally it is in Photoshop. Indeed, you lot can utilize these ii programs together to create some superb textured effects. Once you've created an old newspaper texture in Photoshop, you can easily apply it to an image using Luminar.
If you don't want to create your own textures from scratch, Luminar actually has some texture presets you can download. Establish Textures is an astonishing texture pack featuring many different natural textures. These high-quality textures, which mimic natural materials such as metallic and cobweb, can be practical to photos using the methods we've described above. You can try out these awesome textures for yourself by downloading the costless trial version of Luminar. The trial gives you total access and allows you to experience what this photograph editor has to offer.
![]() Luminariii
Luminariii
Luminar 3 - Time Does Matter
The fastest manner to make your photos stand out Complex photo editing made easy with
AI powered tools
- Accent AI 2.0
- AI Sky Enhancer
- More than 70 Instant Looks
- Apace erase unwanted objects
- Denoise
- Sharpening
- And - More than
FollowSkylum Software on YouTube // Get the latest videos, tips, and photography inspiration each week!

Source: https://skylum.com/how-to/how-to-create-an-old-paper-texture-in-photoshop
Posted by: watsonprignoced.blogspot.com
0 Response to "How To Add Texture To A Color In Photoshop"
Post a Comment